How do I add an inventory category? #
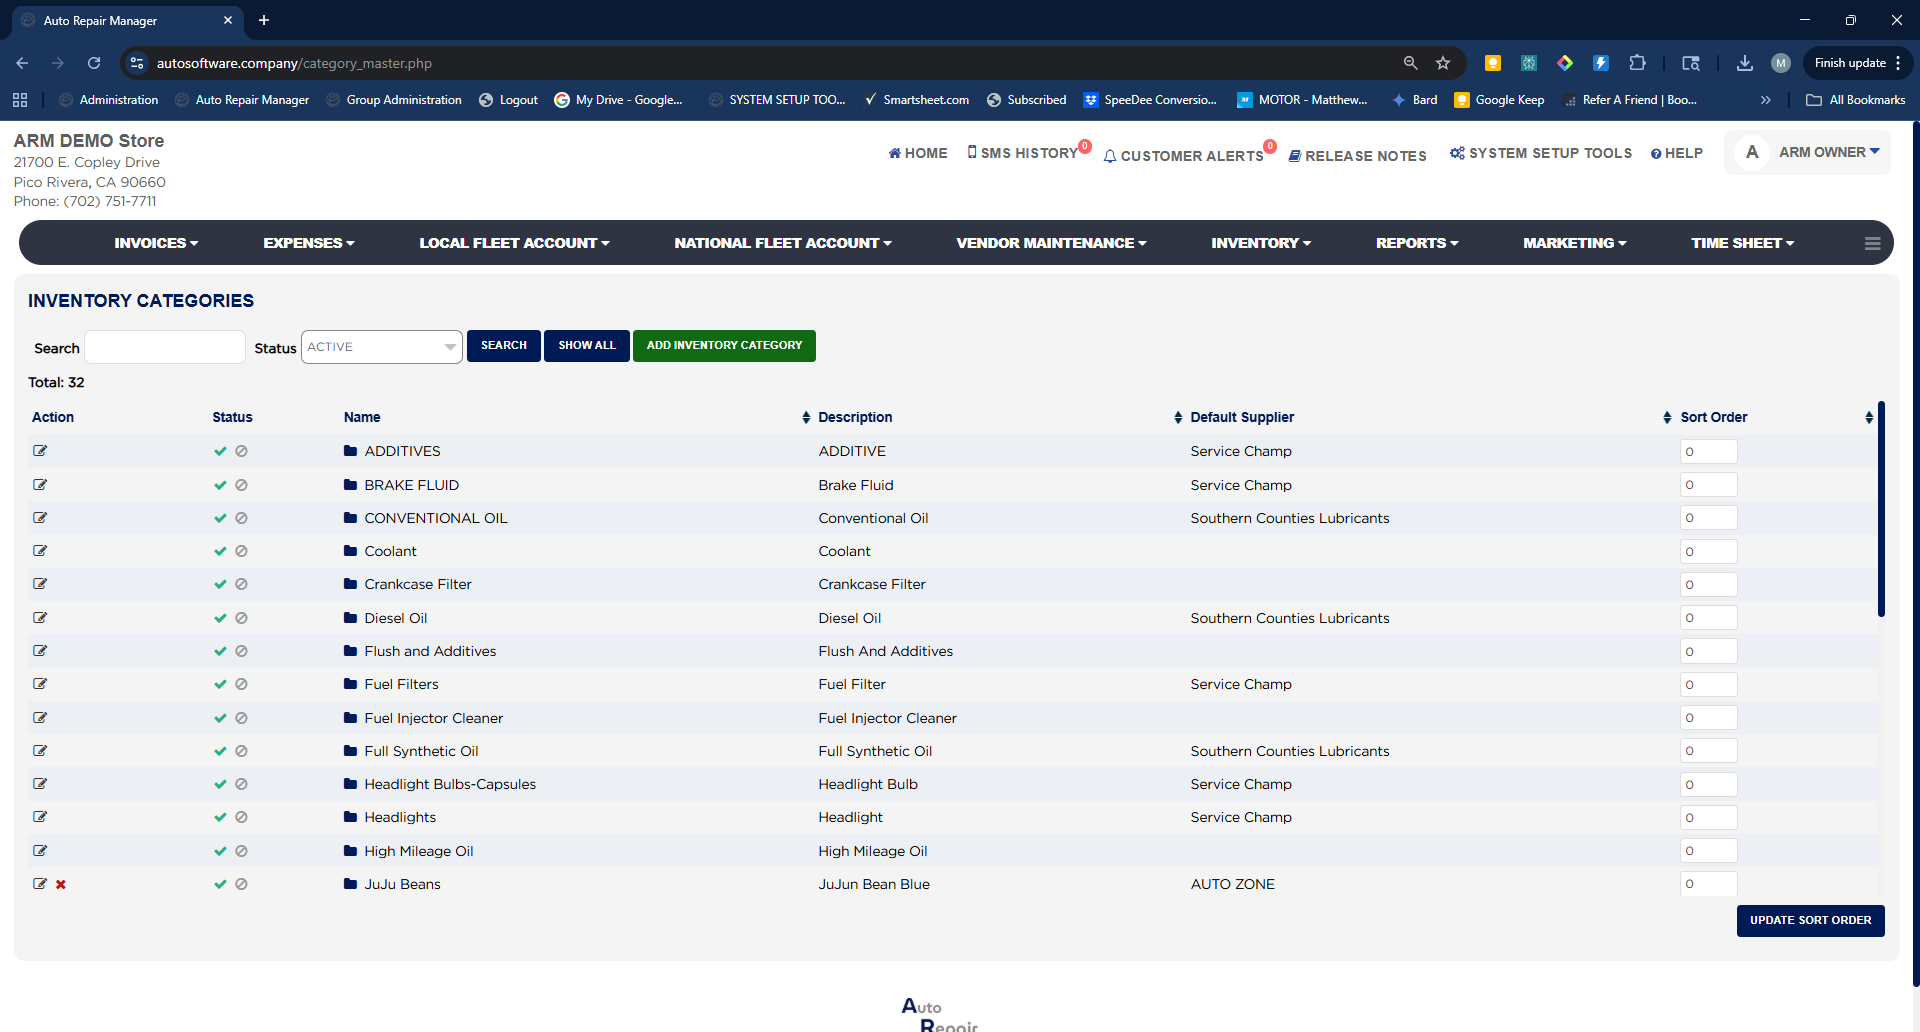
- From the Home Screen, click Inventory → Inventory Categories.
- Click Add Inventory Category.
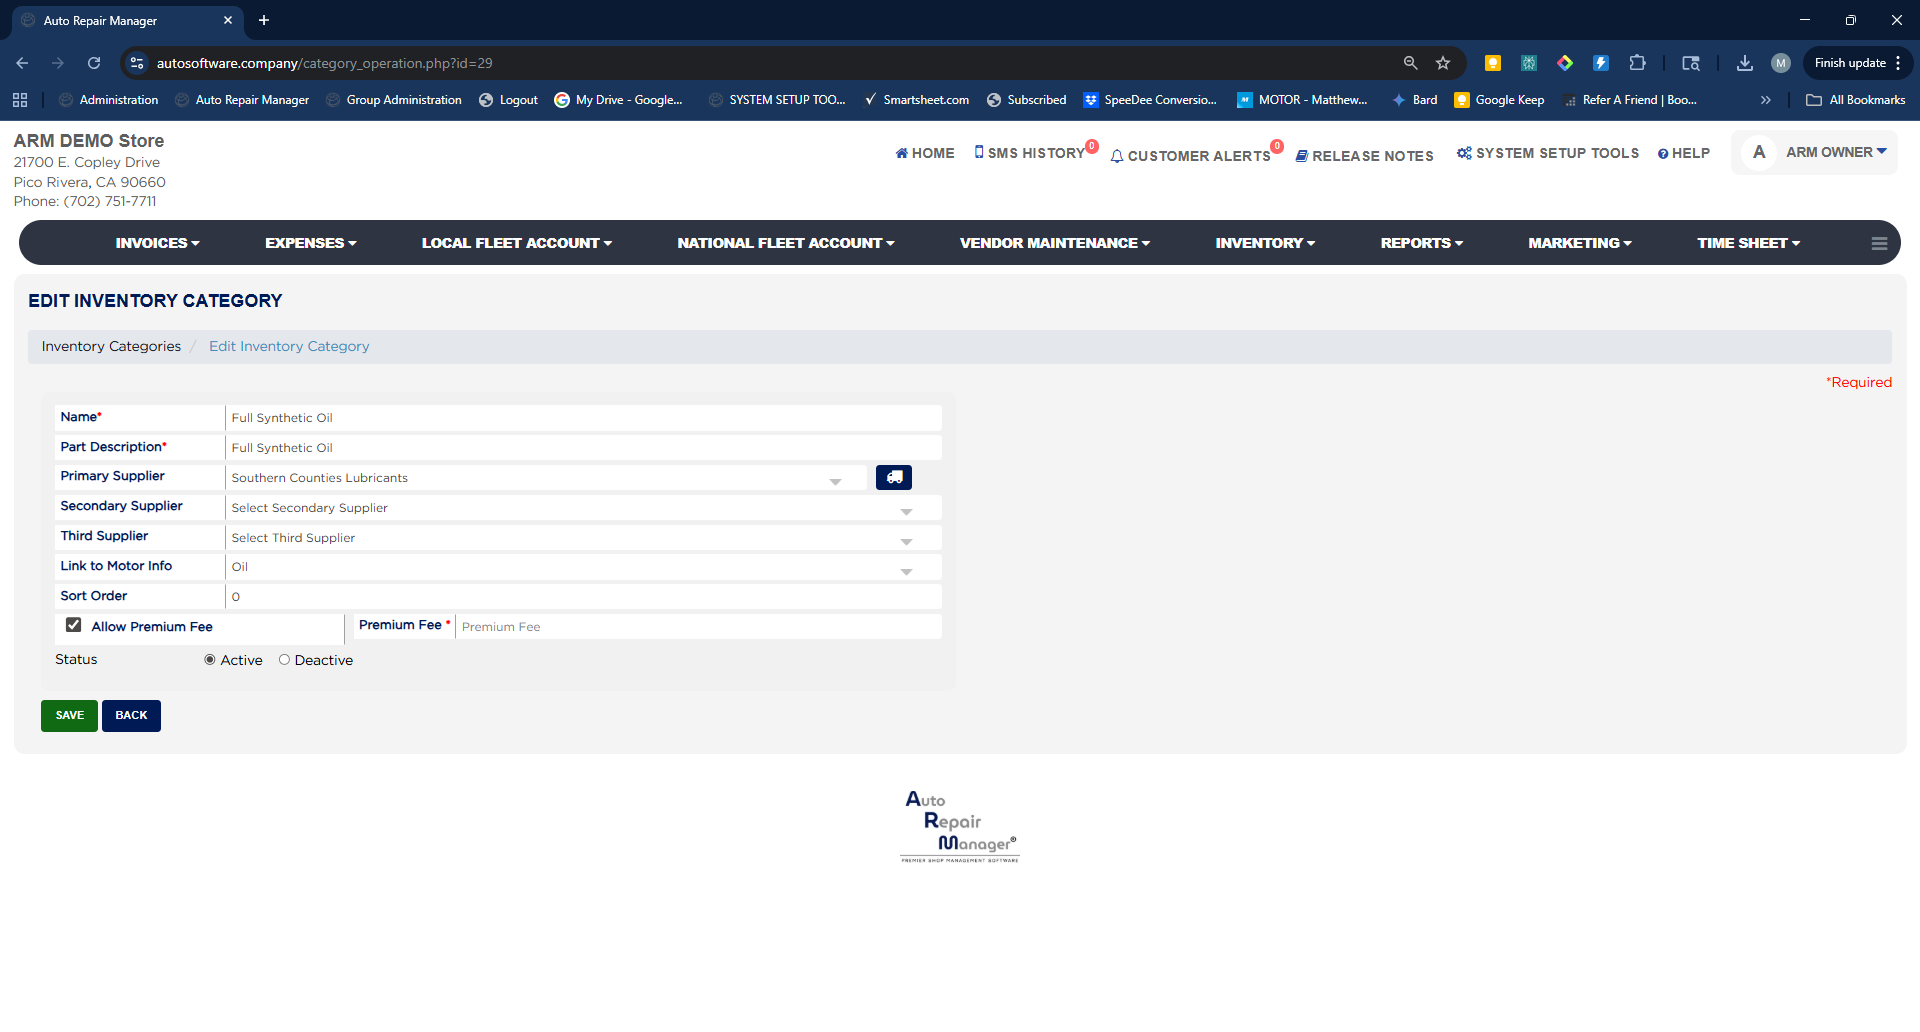
- Enter the Name (required) — for example *Full Synthetic Oil*.
- Enter the Part Description (required). This description is inserted on the Invoice Entry screen when a part from this category is used, unless the individual part has its own description.
- Choose a Primary Supplier, and optionally a Secondary Supplier and Third Supplier. These become the vendor options when you generate a purchase order, so set your main bulk vendor as the Primary Supplier.
- Set Link to Motor Info to the matching Motor category so ARM can pull the correct specifications and part numbers — use this for oil, oil filters, air filters, cabin filters, fuel filters, transmission filters, wiper blades, and fluids. Leave it blank for categories Motor does not cover, such as Tires or Brake Pads.
- Enter a Sort Order number. Lower numbers appear first on the Parts screen.
- To charge a premium on everything in this category, check Allow Premium Fee and enter the Premium Fee amount. Leave it blank to set premiums on individual parts instead.
- Leave Status set to Active and click Save.