ARM Help

Choosing the Vehicle and Entering the Odometer

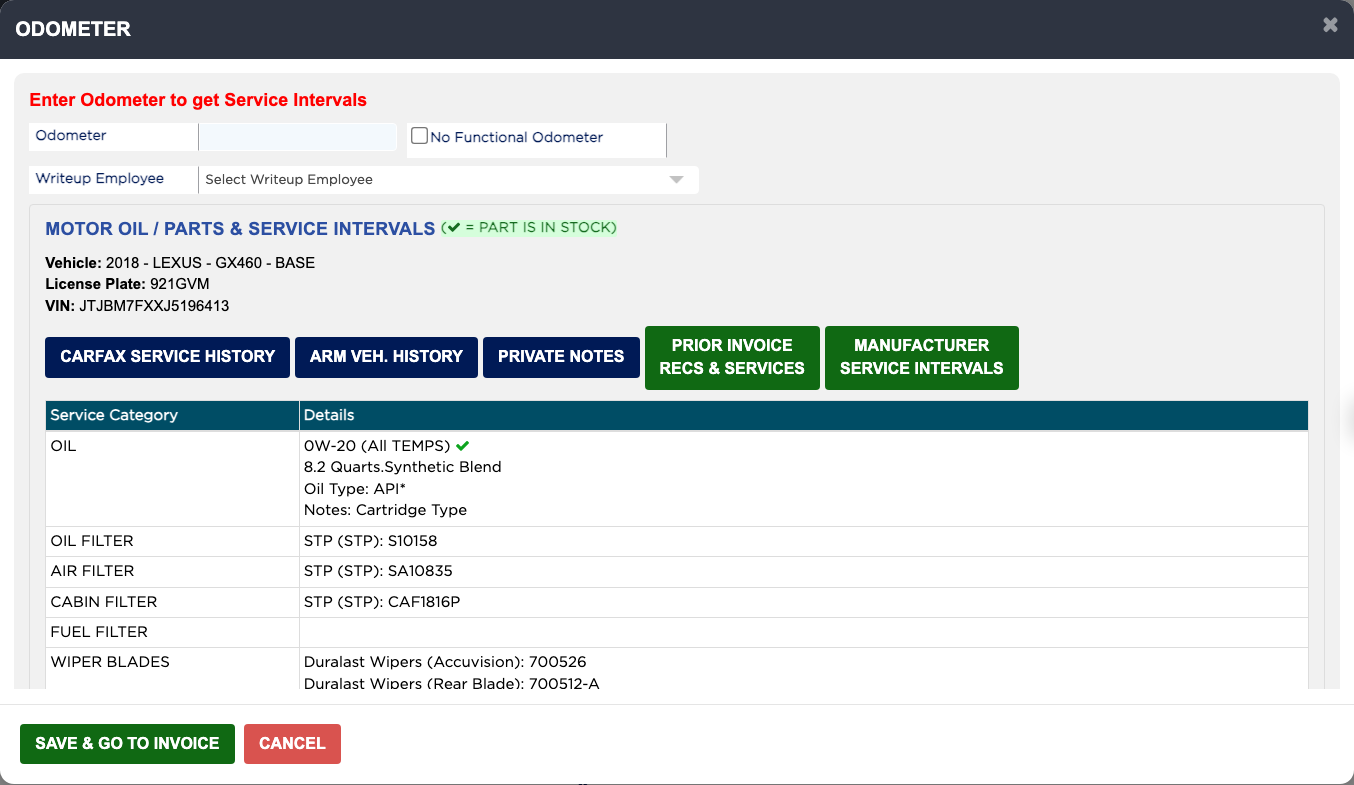
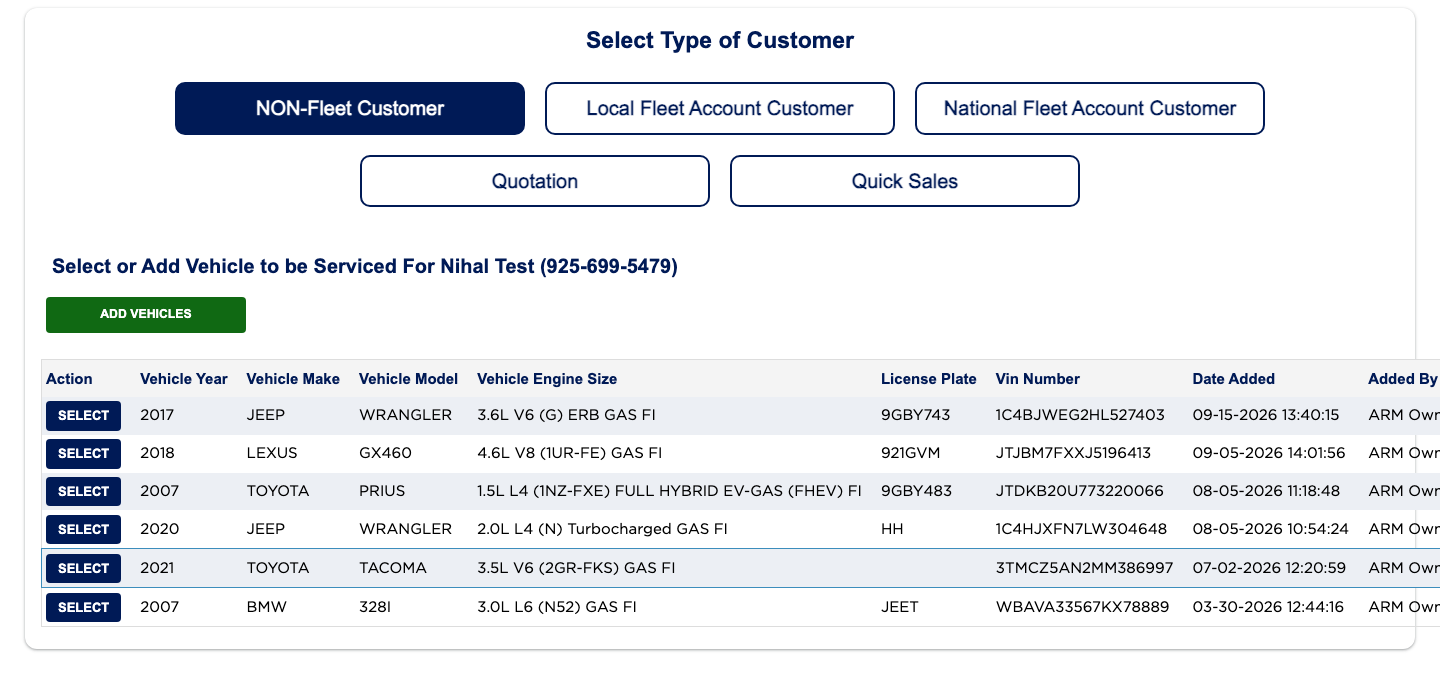
After you pick a customer, ARM lists their vehicles under Select or Add Vehicle to be Serviced, with the Year, Make, Model, Engine Size, License Plate, VIN and who added it. Picking a vehicle opens the Odometer window, which also works as a quick check-in: it shows the oil, filters and wiper blades for that vehicle (a tick means the part is in stock), and has buttons for CARFAX SERVICE HISTORY, ARM VEH. HISTORY, PRIVATE NOTES, PRIOR INVOICE RECS & SERVICES and MANUFACTURER SERVICE INTERVALS. A vehicle can only have one draft invoice at a time.
5 how-to answers 4 screenshots Open in ARM Markdown

How do I add a vehicle for a customer? #

  1. From the Home Screen, click Invoices → Add Invoice, choose the type of customer, and SELECT the customer.
  2. Click ADD VEHICLES.
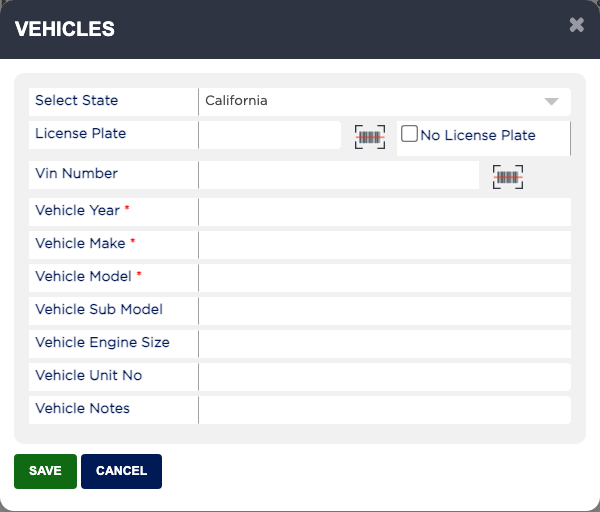
  3. Choose the Select State and enter the License Plate. If the car has no plate, tick No License Plate and enter the Vin Number instead.
  4. When you leave the plate or finish typing the VIN, ARM looks the vehicle up and fills in the Vehicle Year, Vehicle Make, Vehicle Model, Sub Model and Engine Size.
  5. Check the details. Vehicle Year, Vehicle Make and Vehicle Model are required.
  6. Add the Vehicle Unit No and Vehicle Notes if you use them, and click SAVE.
  7. Click SELECT beside the new vehicle to carry on. Saving a vehicle does not select it for you.
Select or Add Vehicle to be Serviced

How do I scan a license plate or VIN instead of typing it? #

  1. From the Home Screen, click Invoices → Add Invoice and choose the type of customer.
  2. Click the scan icon beside Enter License Plate # or Enter VIN.
  3. For a plate, point the device camera at the plate and click Scan License Plate #. For a VIN, point the camera at the VIN barcode and ARM reads it by itself.
  4. ARM fills in the plate or VIN. Click GO to run the search.
  5. VIN scanning is an add-on. If it is not switched on for your shop, ARM says "Vin Scan is not subscribed. Please contact ARM to enable this feature."

Why can't I start a new invoice for this vehicle? #

  1. From the Home Screen, click Invoices → Add Invoice and select the customer.
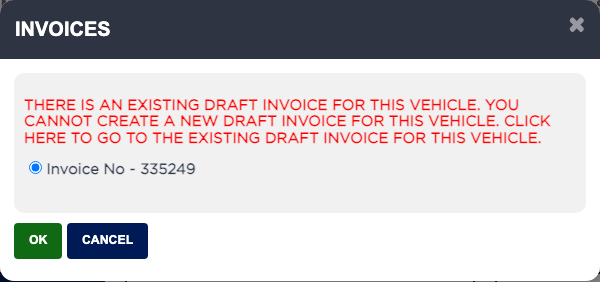
  2. When you select a vehicle that already has a draft invoice for this customer, ARM shows "There is an existing draft invoice for this vehicle. You cannot create a new draft invoice for this vehicle."
  3. Click OK to open the existing draft, and add today's work to it.
  4. If the draft belongs to a different customer with the same plate, ARM also offers Create New Invoice, so you can start a separate one.
Existing draft invoice for this vehicle

How do I check the vehicle's history before writing the invoice? #

  1. From the Home Screen, click Invoices → Add Invoice, select the customer and select the vehicle.
  2. In the Odometer window, click ARM VEH. HISTORY to see earlier work done in your shop, and click Print to print it.
  3. Click PRIOR INVOICE RECS & SERVICES to see what was done and recommended on the last finalized invoice.
  4. Click PRIVATE NOTES to read your staff's notes about this customer. The red and green numbers are the count of negative and positive notes.
  5. Click MANUFACTURER SERVICE INTERVALS to see the services the manufacturer lists for this mileage, and CARFAX SERVICE HISTORY for the vehicle's CARFAX report.
Add Vehicles window
Add Vehicles window
Odometer window with parts and service intervals

What if the odometer is broken? #

  1. From the Home Screen, click Invoices → Add Invoice, select the customer and select the vehicle.
  2. In the Odometer window, tick No Functional Odometer. The Odometer box clears.
  3. Click SAVE & GO TO INVOICE.

Ask AI