ARM Help

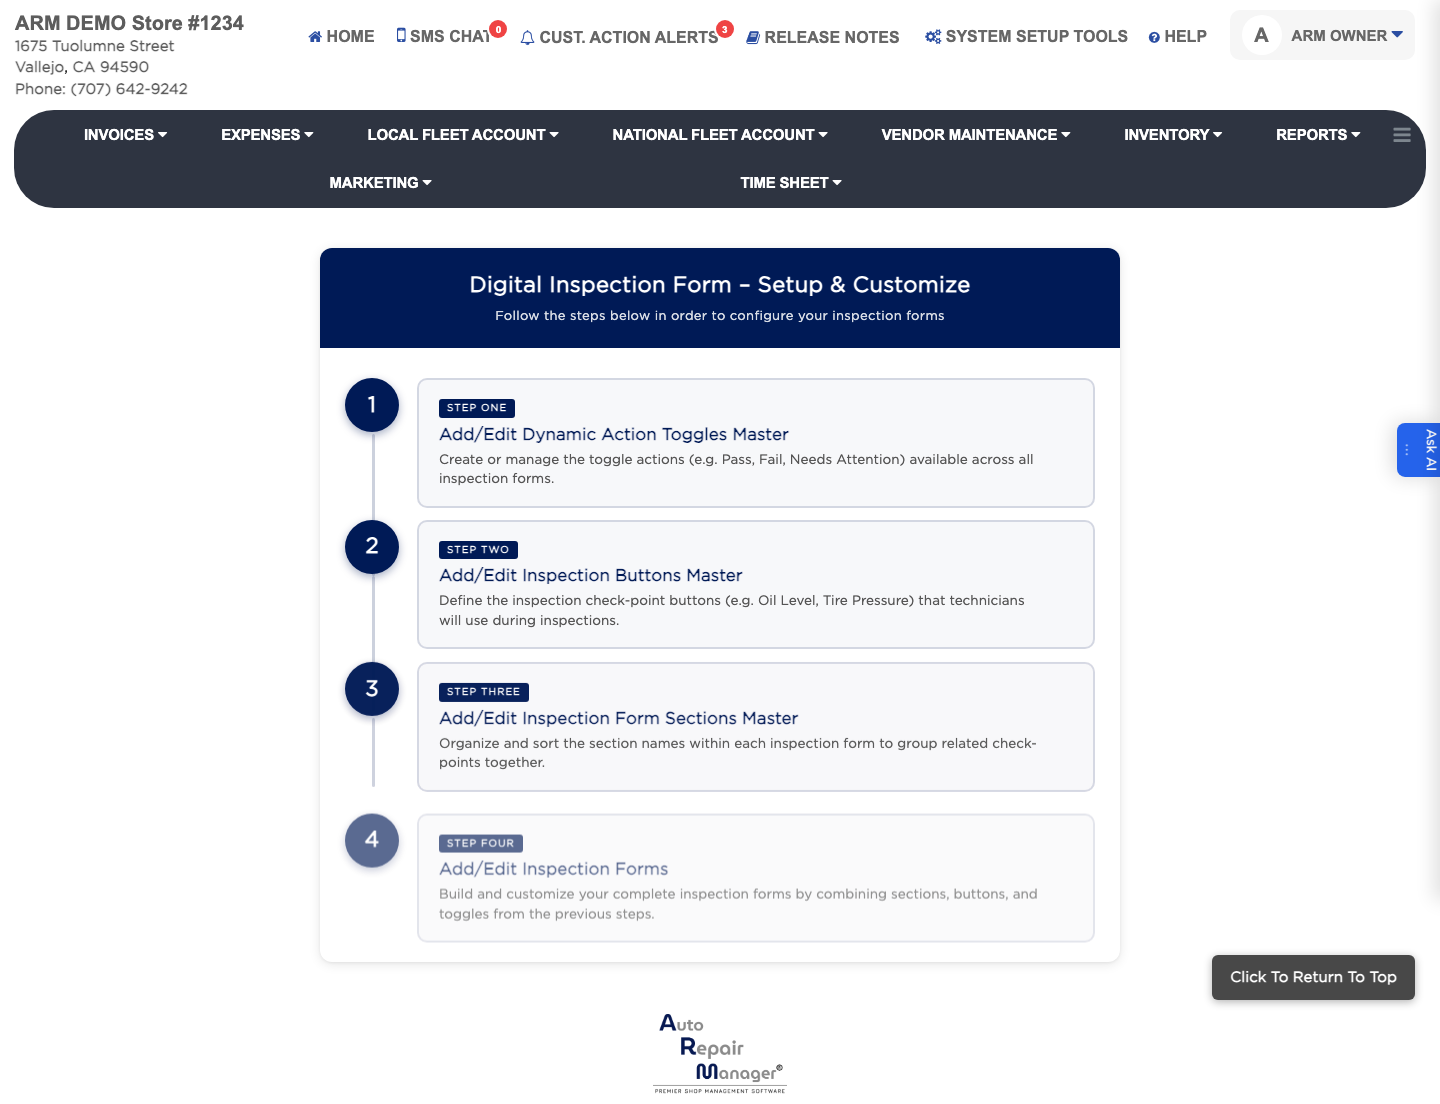
Digital Inspection Form – Setup & Customize

The digital inspection form is what a technician fills in on a tablet, and it is built in four steps that must be done in order, because each step uses what the one before it created. First you define the action toggles (the Pass / Fail / Needs Attention style results), then the inspection buttons (the individual check points), then the form sections that group those buttons, and finally the inspection forms themselves. The screen walks you through the four steps and greys out the later ones until the earlier ones are done.
4 how-to answers 4 screenshots Open in ARM Markdown

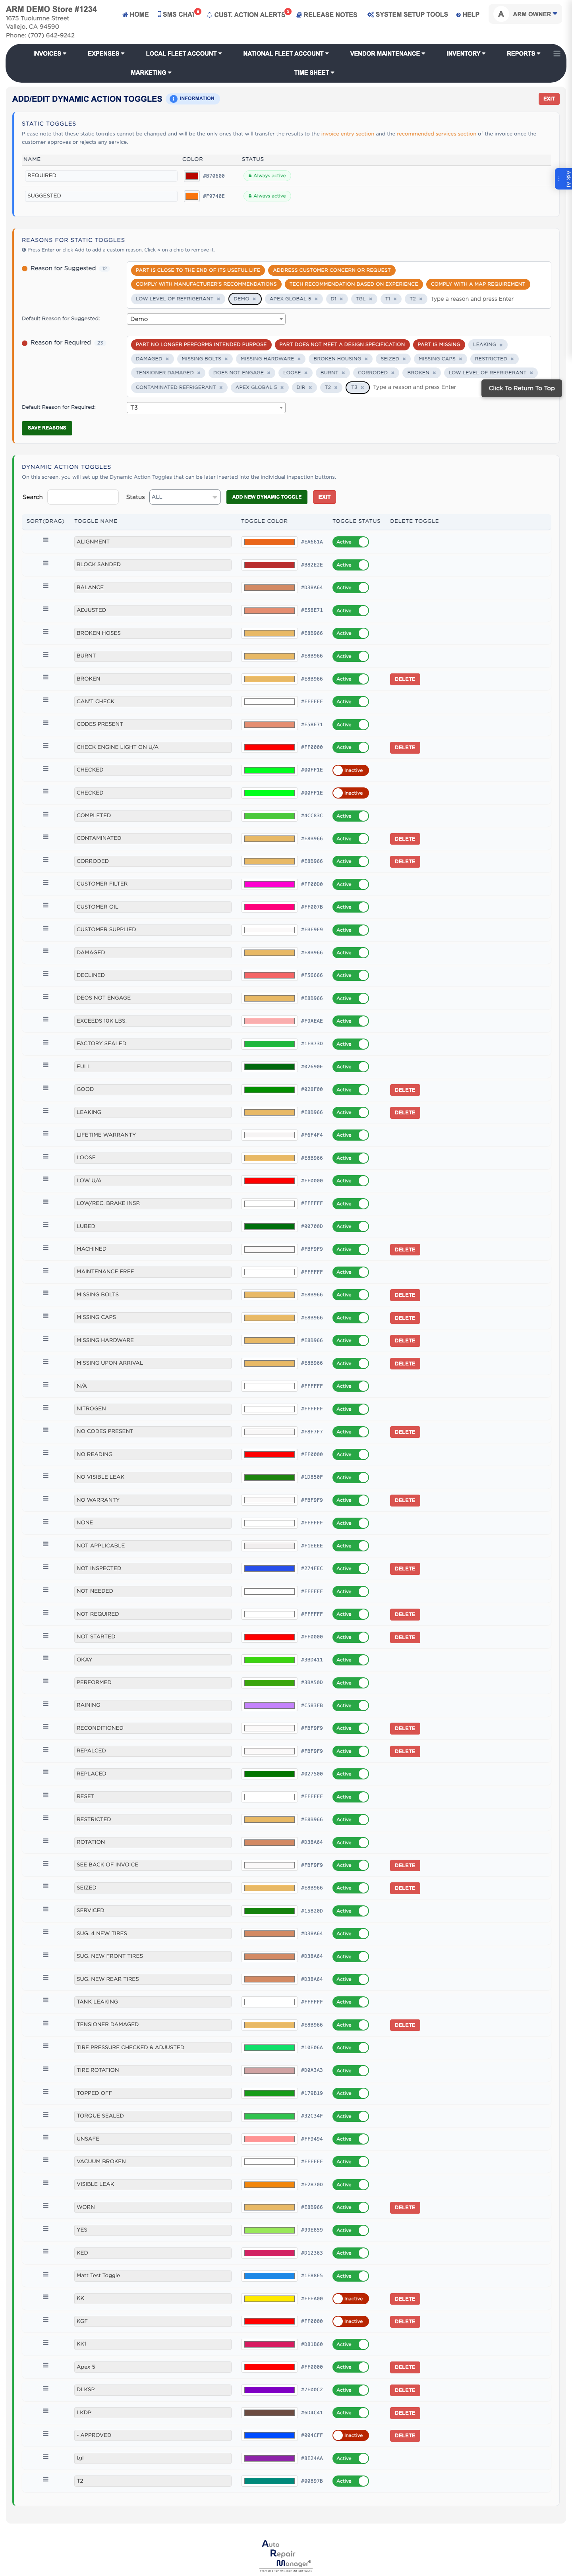
How do I set up the action toggles technicians choose from? #

  1. From the Home Screen, click System Setup Tools → Digital Inspection Form – Setup & Customize.
  2. Click Add/Edit Dynamic Action Toggles Master, which is step one.
  3. Click ADD NEW DYNAMIC TOGGLE, enter the Toggle Name and pick its Toggle Color — the colour is what the technician and the customer see against each check point.
  4. Set Toggle Status to Active.
  5. Under Reason for Suggested and Reason for Required, type each reason and press Enter to add it, then pick the Default Reason for Suggested and Default Reason for Required.
  6. Click SAVE REASONS, then EXIT.
Dynamic action toggles and their reasons

How do I create the inspection check points? #

  1. From the Home Screen, click System Setup Tools → Digital Inspection Form – Setup & Customize.
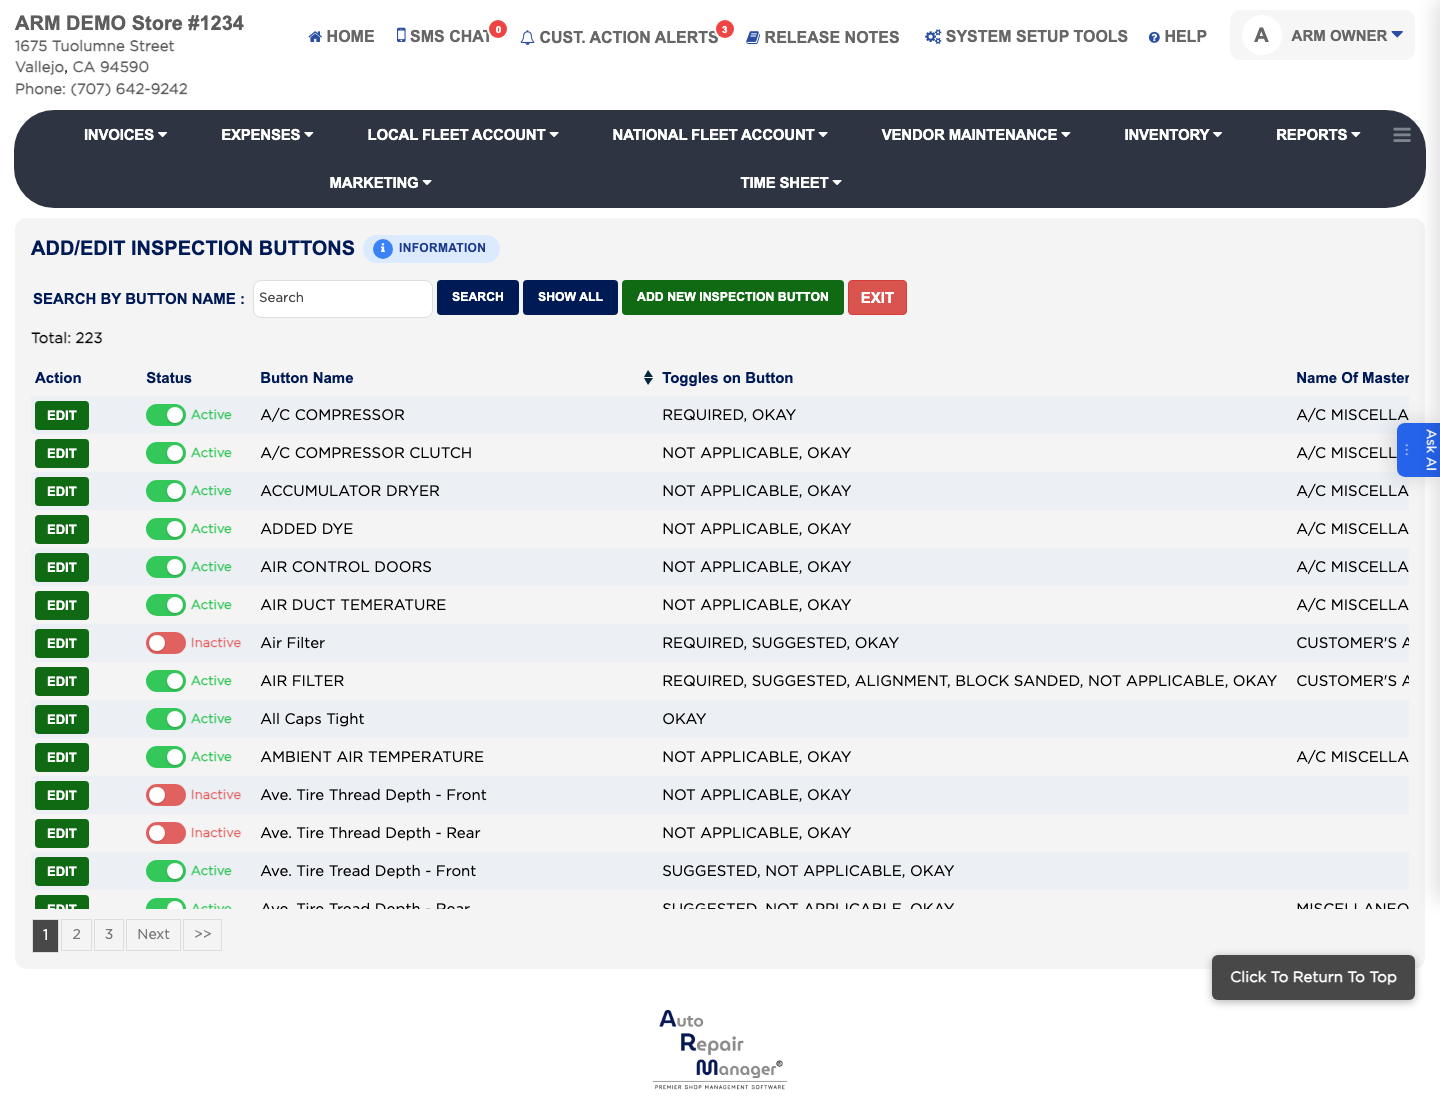
  2. Click Add/Edit Inspection Buttons Master, which is step two.
  3. Click ADD NEW INSPECTION BUTTON.
  4. Enter the Button Name, such as Oil Level or Tire Pressure, and choose which Toggles on Button the technician may pick from.
  5. Link it to a master service package so a failed check can be turned into work to sell.
  6. Set whether the button is required to finalize the invoice, and whether a photo is required.
  7. Click Save, then EXIT.
Inspection buttons list

How do I group check points into sections? #

  1. From the Home Screen, click System Setup Tools → Digital Inspection Form – Setup & Customize.
  2. Click Add/Edit Inspection Form Sections Master, which is step three.
  3. Click ADD NEW INSPECTION FORM SECTION.
  4. Enter the Section Name, such as Under Hood or Tires and Brakes.
  5. Set Status to Active and click Save, then EXIT.
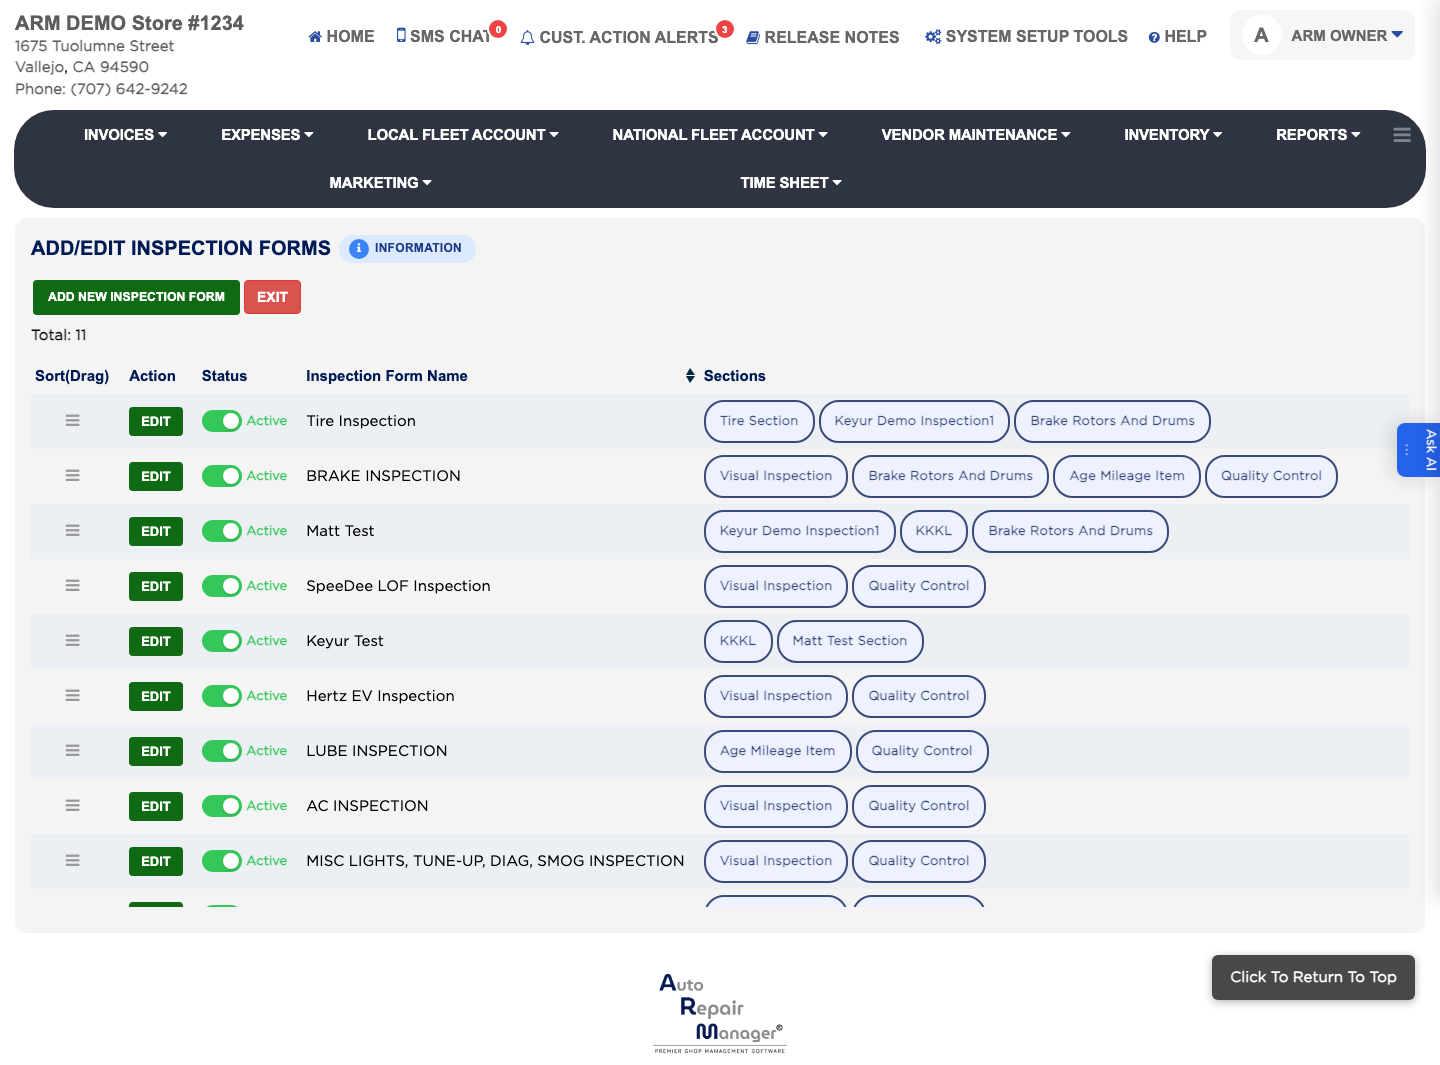
Inspection forms and their sections

How do I build the inspection form itself? #

  1. From the Home Screen, click System Setup Tools → Digital Inspection Form – Setup & Customize.
  2. Click Add/Edit Inspection Forms, which is step four.
  3. Click ADD NEW INSPECTION FORM.
  4. Enter the Inspection Form Name and choose the Sections it should contain.
  5. Drag the handle in the Sort(Drag) column to put the sections in the order the technician should work through them.
  6. Set Status to Active and click Save.
Digital Inspection Form setup — the four steps

People also ask

  • asked 2×
  • asked 1×
  • asked 1×
  • asked 1×
  • asked 1×

Ask AI