ARM Help

Pricing Matrix

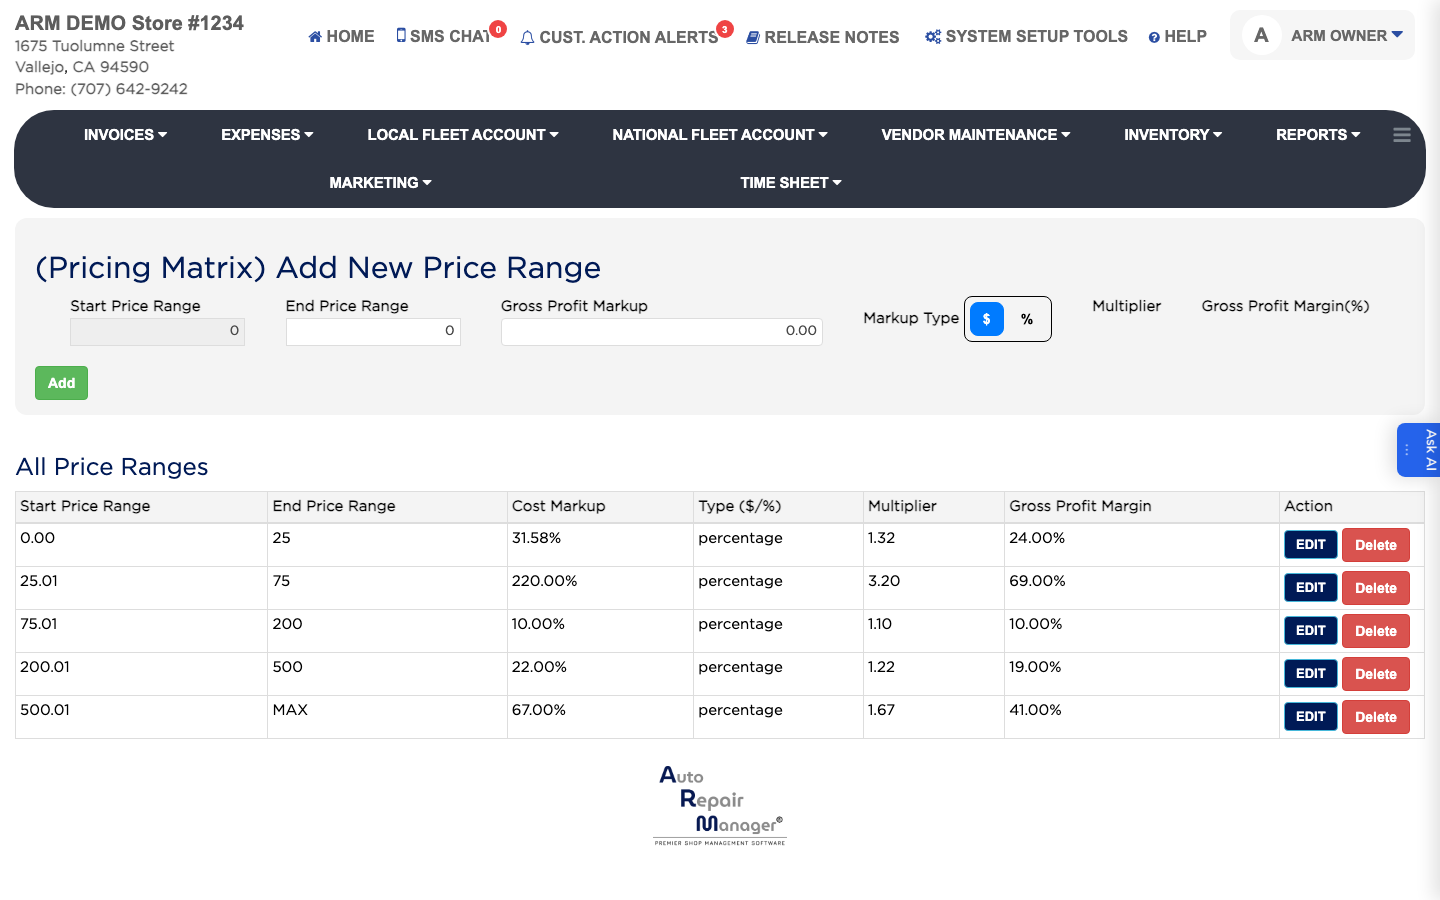
The Pricing Matrix sets your parts markup automatically by cost band, so a cheap part and an expensive part are not marked up by the same rule. You define price ranges, and for each one say how much to add. Ranges must not overlap and should cover every cost you buy at, otherwise a part can fall through the matrix and be priced at cost. The list shows each range's Start Price Range, End Price Range, Cost Markup, Type ($/%), Multiplier and Gross Profit Margin.

2 how-to answers 1 screenshot Open in ARM Markdown

How do I add a price range to the matrix? #

  1. From the Home Screen, click System Setup Tools → Pricing Matrix.
  2. Under Add New Price Range, enter the Start Price Range and the End Price Range the rule covers. The end of the range is required.
  3. Enter the Gross Profit Markup and choose whether it is a $ amount or a % — both the markup and the type are required.
  4. Enter the Multiplier and the Gross Profit Margin(%) you are aiming at. Both are required.
  5. Click Add.
Pricing Matrix price ranges

How do I change or remove a price range? #

  1. From the Home Screen, click System Setup Tools → Pricing Matrix.
  2. Find the band under All Price Ranges.
  3. Click Edit in the Action column, change the values, and save — or click Delete to remove the band.
  4. After removing a band, check the remaining ranges still cover every cost you buy at, so nothing is left unpriced.

People also ask

  • asked 1×
  • asked 1×

Ask AI