ARM Help

Groups

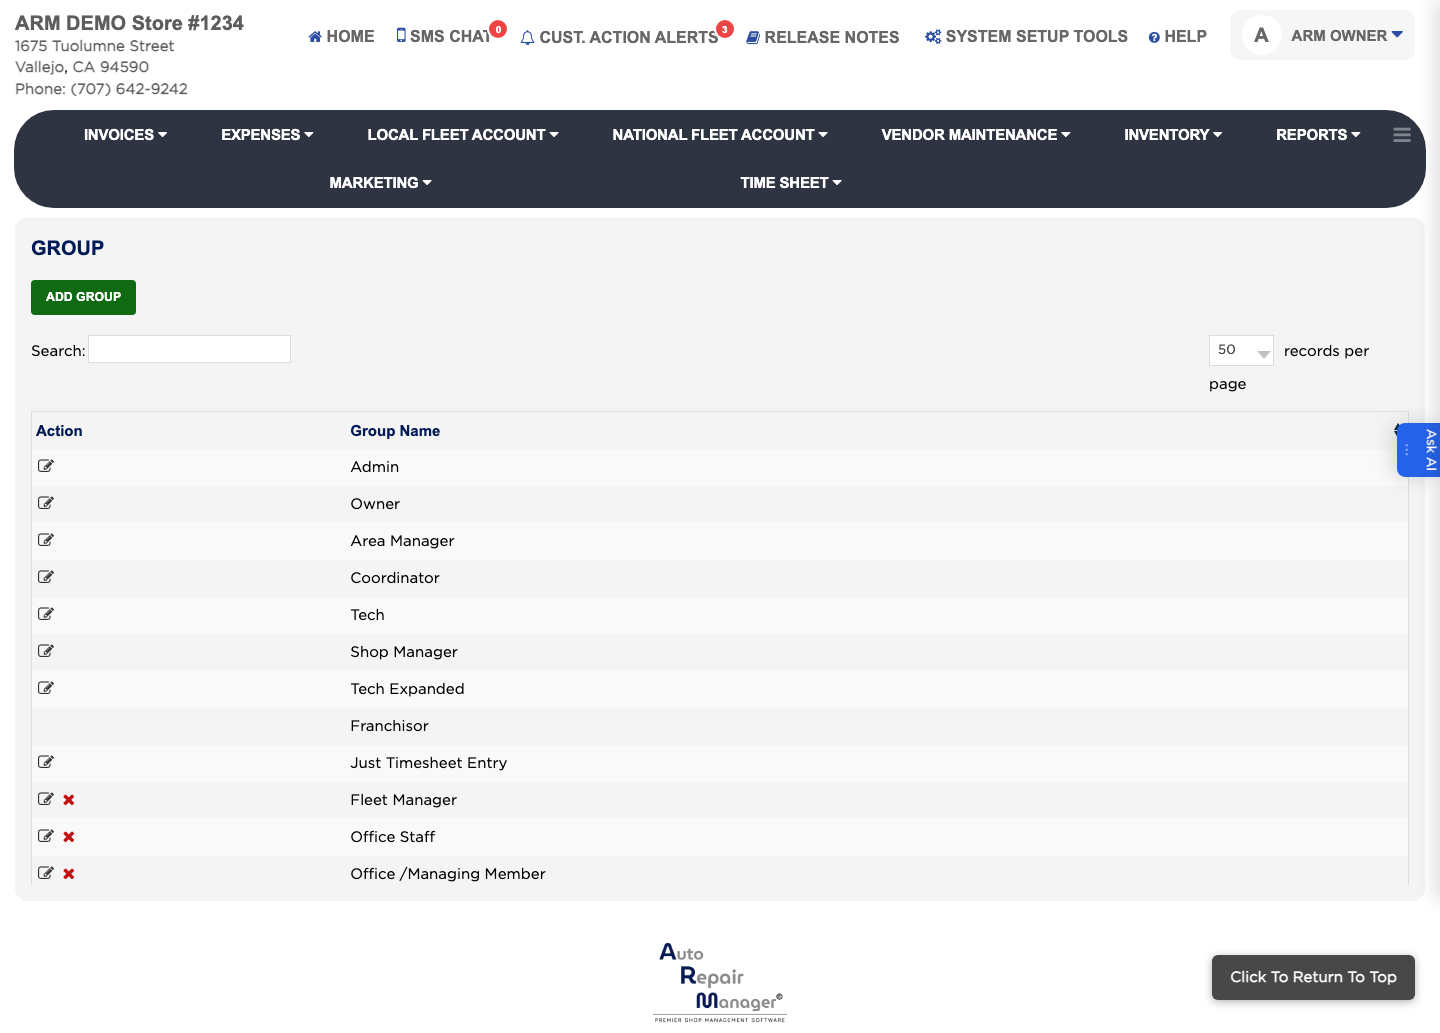
A group is a named set of permissions that you attach to a user, so you set access once per role instead of once per person. Each group is built from the ARM menu: for every menu item you decide whether the group can see it at all, and whether it can Add, Edit/Export or Delete within it. The Groups list shows the Group Name of each role you have defined.

3 how-to answers 2 screenshots Open in ARM Markdown

How do I create a group? #

  1. From the Home Screen, click System Setup Tools → Groups.
  2. Click Add Group.
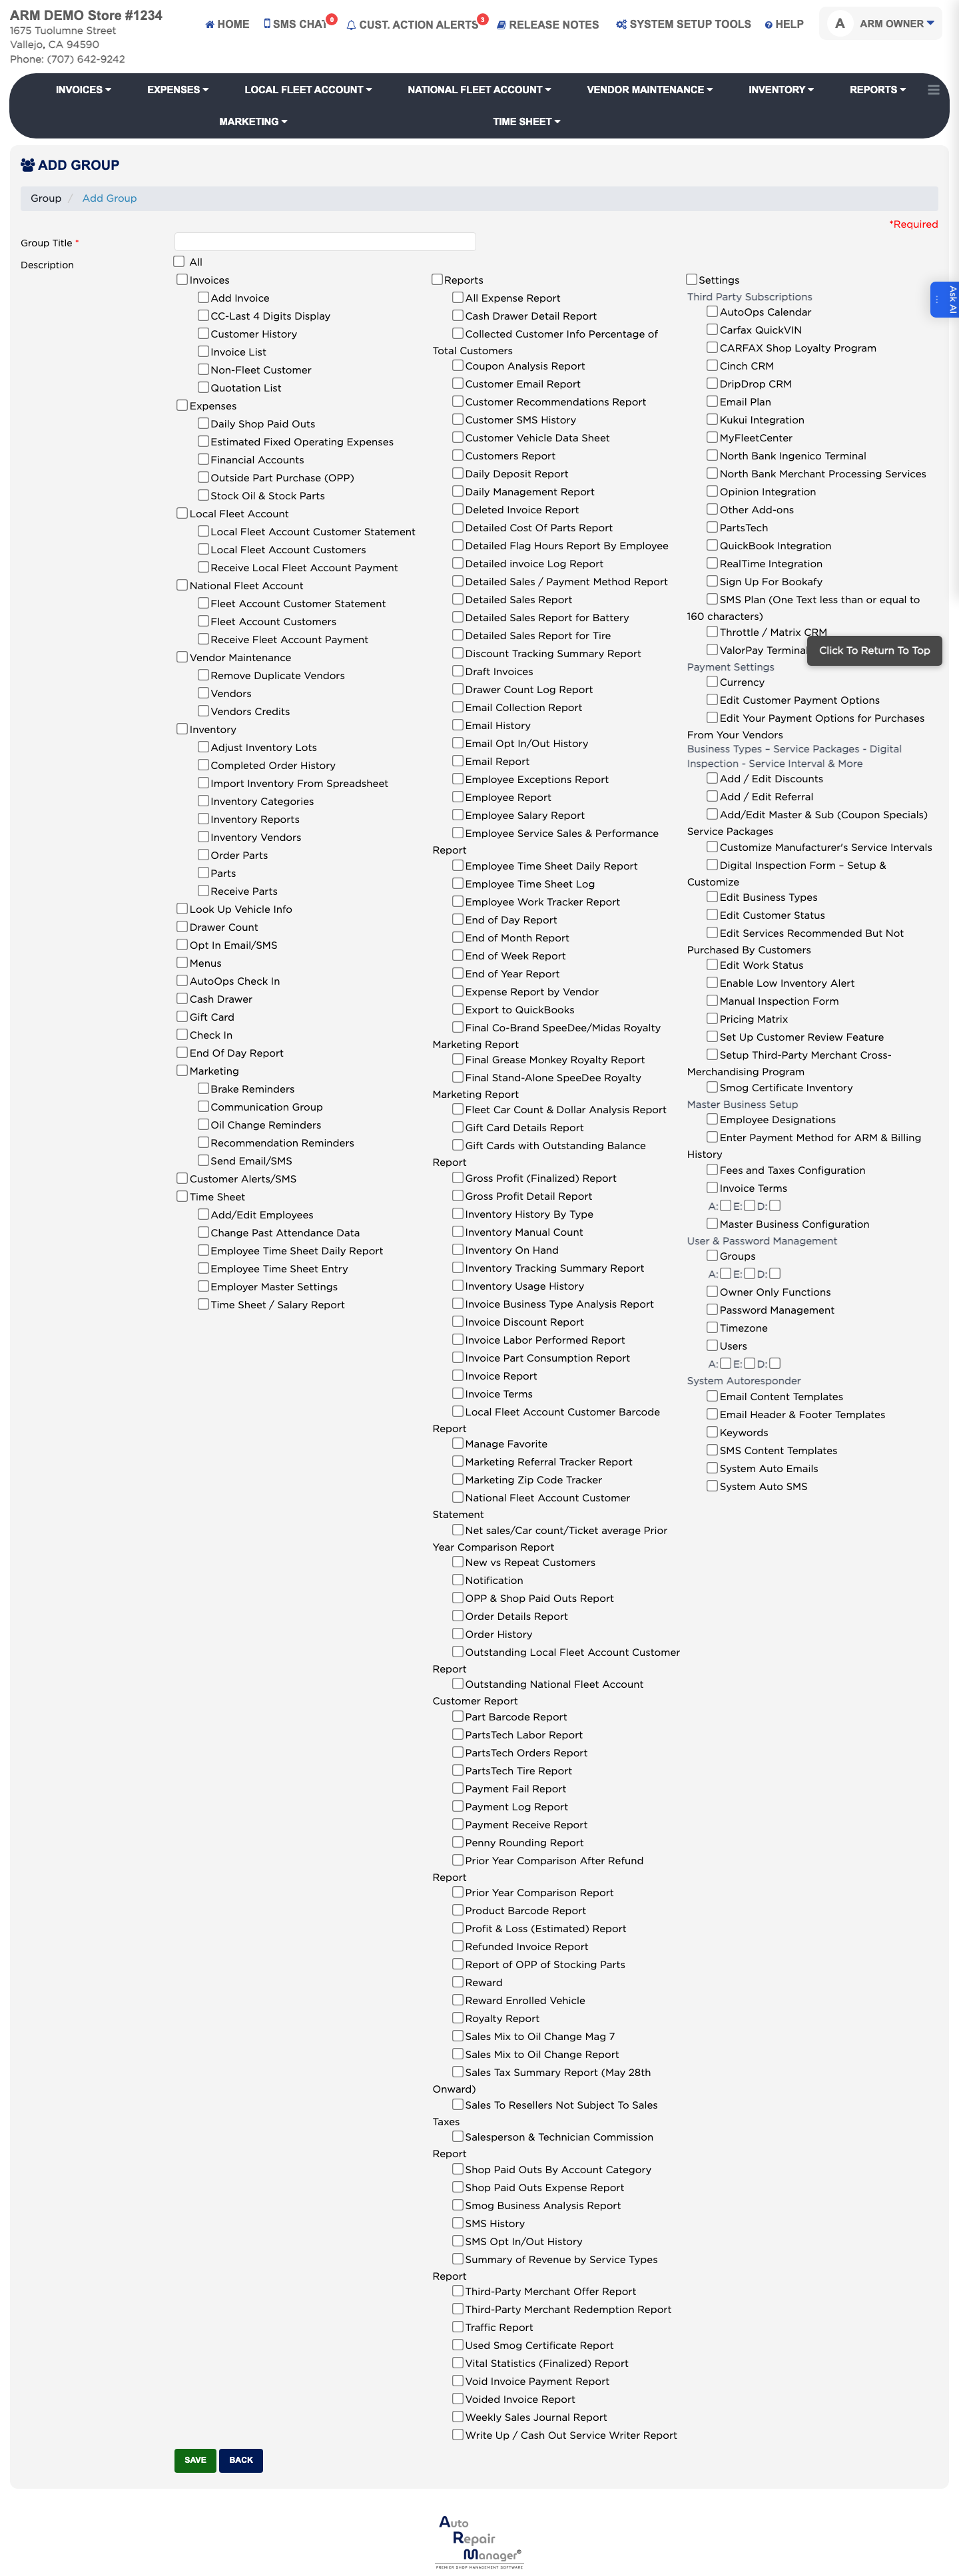
  3. Enter the Group Title — use the role name, such as Shop Manager or Service Advisor. This is required.
  4. Tick each menu the group should be able to open.
  5. For each menu you ticked, choose what the group may do there: Add to create records, Edit/Export to change or export them, and Delete to remove them. Leave a box clear to withhold that action.
  6. Click Save.
Add Group form with menu permissions

How do I change what a role can do? #

  1. From the Home Screen, click System Setup Tools → Groups.
  2. Click the edit icon beside the group in the Action column.
  3. Tick or clear the menus and the Add, Edit/Export and Delete boxes under them.
  4. Click Save. Everyone assigned to that group picks up the change the next time they sign in.

How do I move a person to a different role? #

  1. From the Home Screen, click System Setup Tools → Users.
  2. Click the edit icon beside the person in the Action column.
  3. Change the Group to the role you want them to have.
  4. Click Save.

People also ask

  • asked 1×

Ask AI