ARM Help ›
System Setup Tools ›
Users
Users
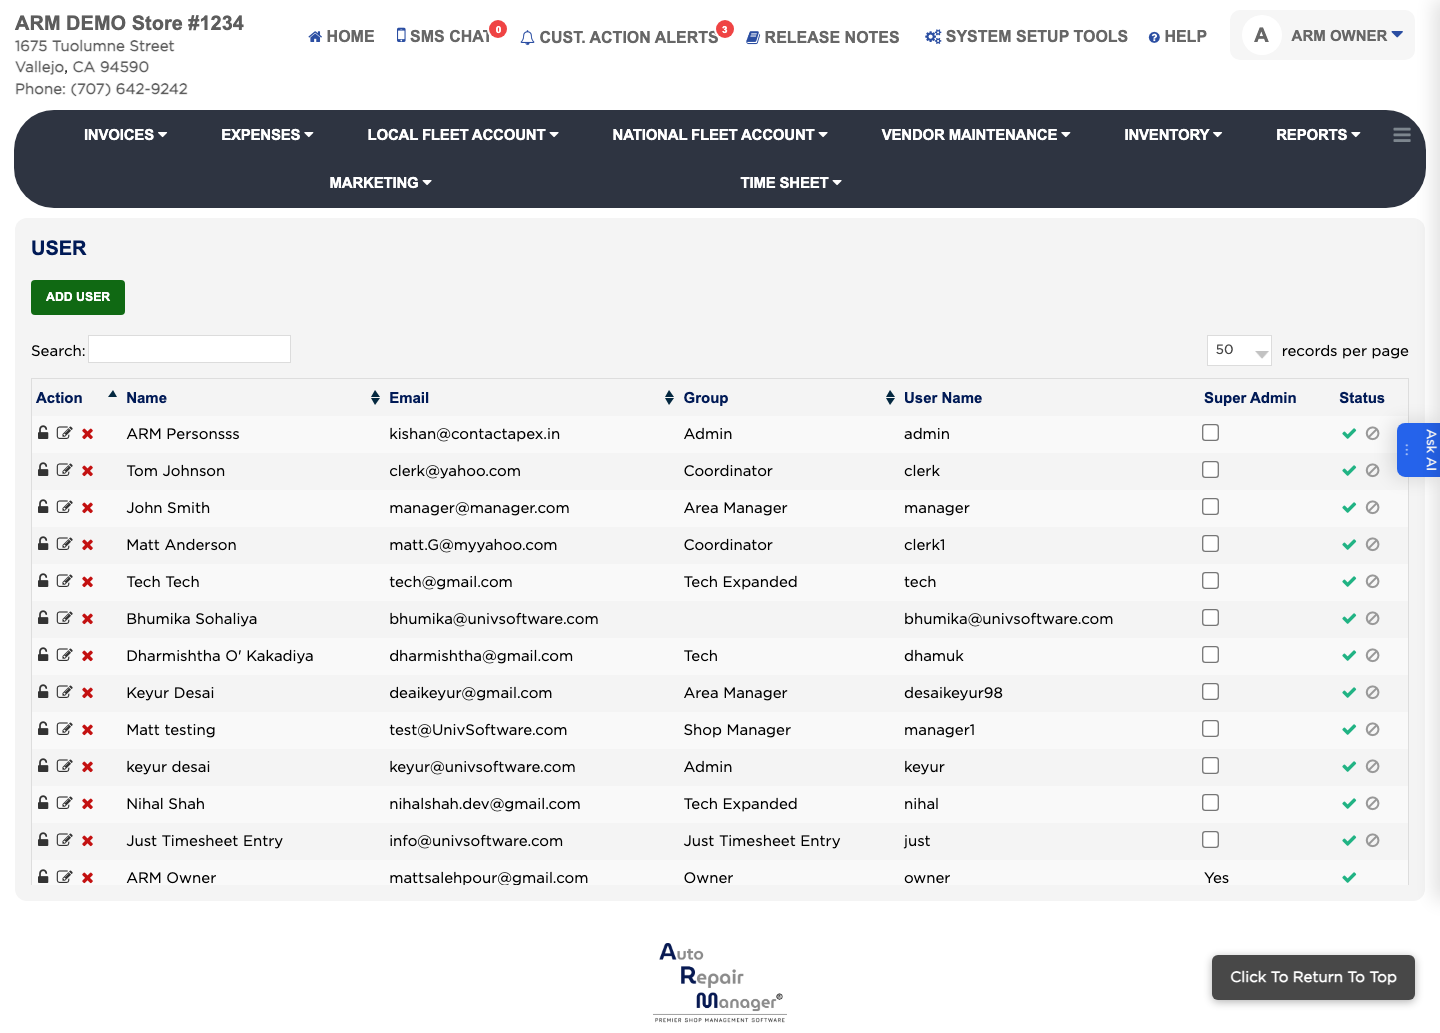
A user is a login to ARM. Users are not the same as employees: an employee is someone you pay and track on timesheets, while a user is someone who can sign in. The Users list shows each login's Name, Email, Group, User Name, Super Admin flag and Status, and the Group column is what decides which screens that person can open.
How do I add a user?
#
From the Home Screen, click System Setup Tools → Users.
Click Add User .
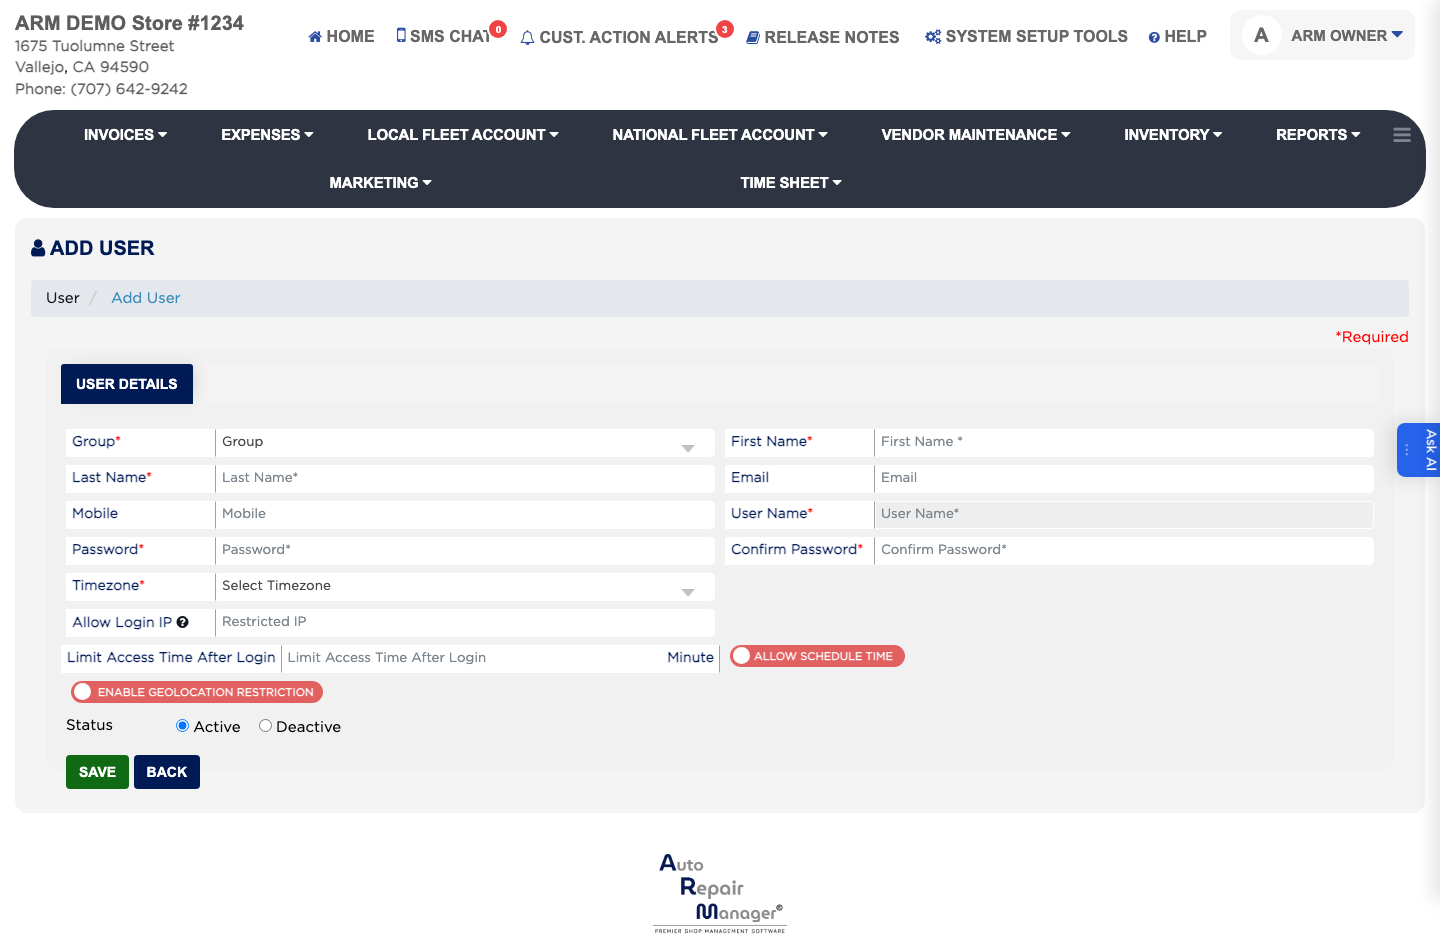
Choose the Group that matches the person's role — the group controls which menus they can open.
Enter the First Name and Last Name. Both are required.
Enter the Email and Mobile so the person can be sent a new password if they forget theirs.
Enter the User Name the person will sign in with, then the Password and Confirm Password. These three are required.
Choose the Timezone for the location this person works at.
Leave Status set to Active.
Click Save.
Add User form
How do I stop a user from signing in?
#
From the Home Screen, click System Setup Tools → Users.
Find the person in the list — type part of their name in Search, or set the records-per-page list to All to see every login.
Click the edit icon in the Action column.
Set Status to Deactive. Deactivate the login rather than deleting it, so the history of what that person did in ARM is kept.
Click Save.
Users list
How do I reset a user's password?
#
From the Home Screen, click System Setup Tools → Users.
Find the person in the list and click the change-password icon in the Action column.
Enter the New Password and Confirm Password. Both are required.
Click Save, then tell the person their new password.
How do I restrict when and where a user can sign in?
#
From the Home Screen, click System Setup Tools → Users.
Click the edit icon beside the person in the Action column.
To tie the login to one location, enter that location's address in Restricted IP — the person can then only sign in from that network.
To sign the person out after a set number of hours, enter that number in Limit Access Time After Login.
Click Save.
Enter Payment Method for ARM & Billing History Next Groups