ARM Help

Email Report

The Email Report is not a report of figures but the place where you set up reports to be e-mailed: each entry is a schedule with a name, one or more recipient addresses, the reports to attach, the date range they should cover, and when to send. ARM builds the chosen reports as PDF or spreadsheet attachments and sends them in one e-mail, either automatically on the schedule or by hand. Use it to have the Daily Management Report land in the owner's inbox every evening, to send the accountant a set of month-end reports on the first of the month, and to e-mail a bundle of reports on demand without opening each one.
4 how-to answers 3 screenshots Open in ARM Markdown

How do I see the report schedules? #

  1. From the Home Screen, click Reports → Management & Operational Reports → Email Report.
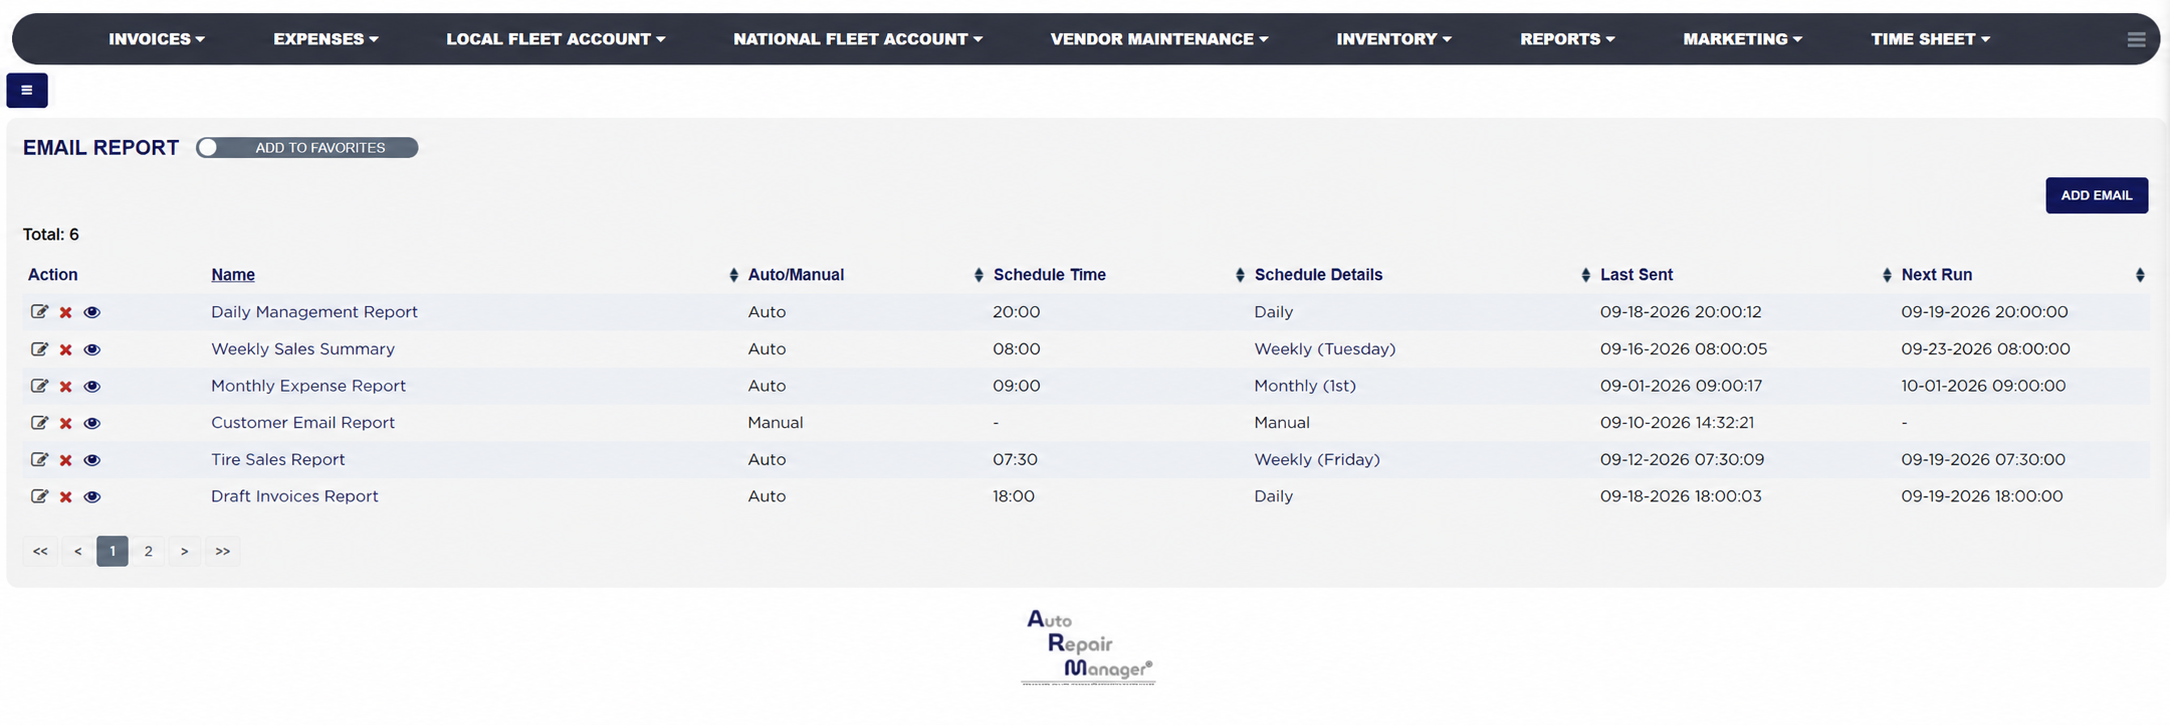
  2. Read the list. Total: above it is the number of schedules. Each line shows the Action icons, the schedule Name, whether it is Auto or Manual under Auto/Manual, the Schedule Time (the hour it sends, blank for a manual schedule), the Schedule Details (Daily, Weekly with the weekday, Monthly with the day of the month, or Manual), the Last Sent date and time and the Next Run.
  3. Click any column heading to sort by it. Long lists are split into pages with page links under the table.

How do I set up a report to be e-mailed? #

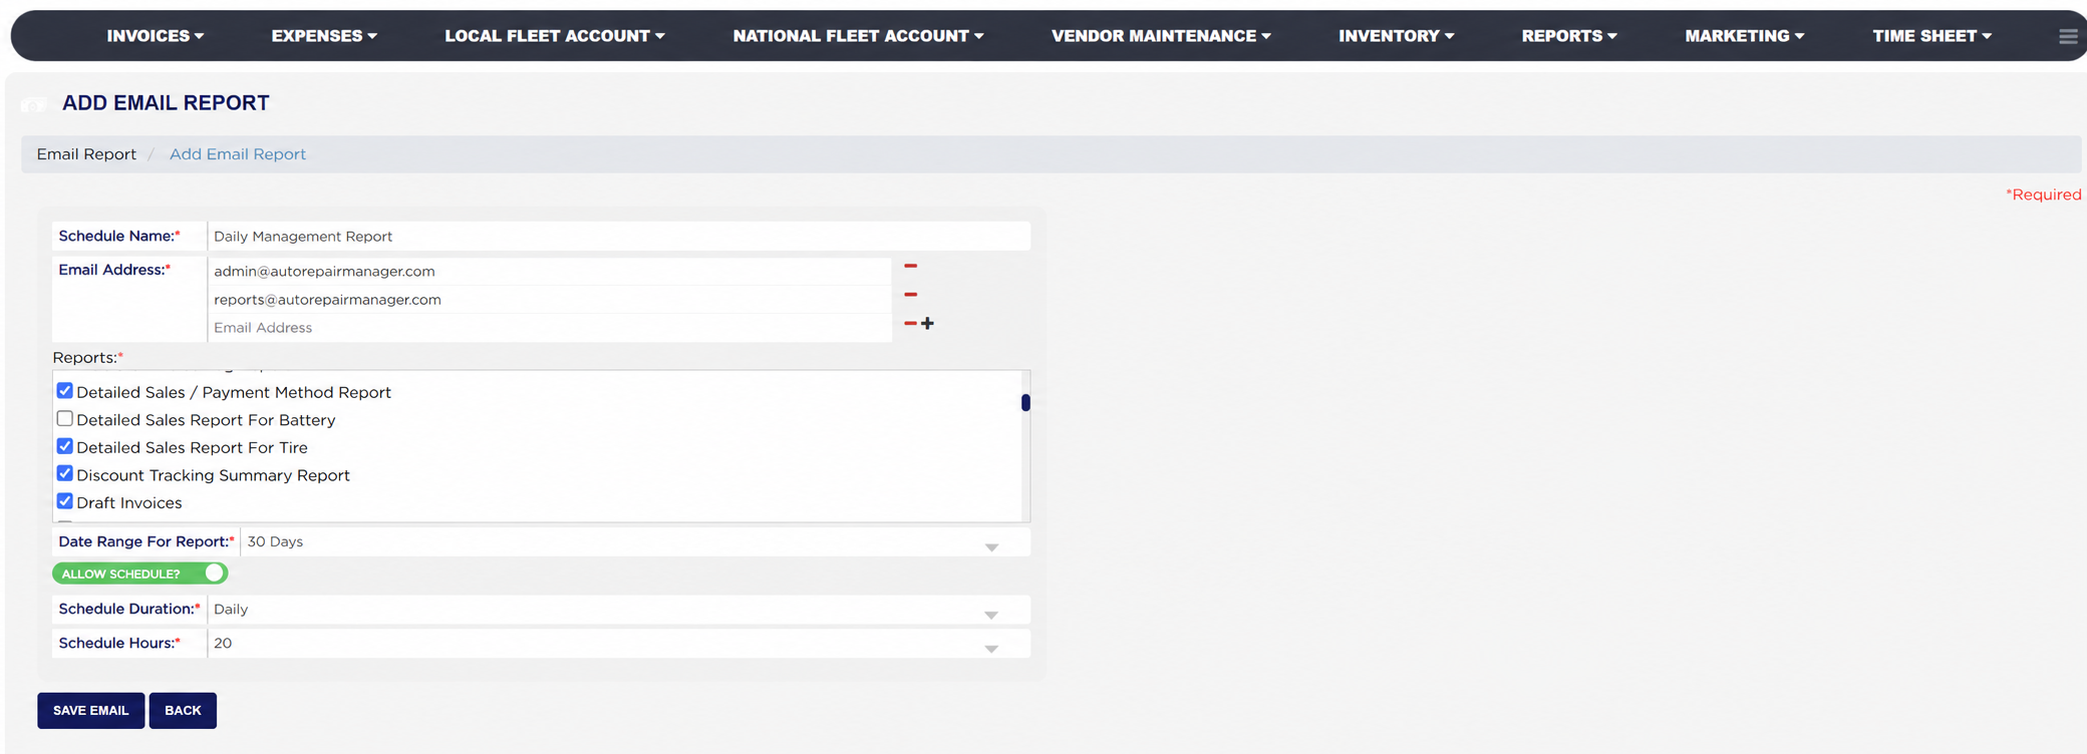
  1. From the Home Screen, click Reports → Management & Operational Reports → Email Report, then click ADD EMAIL. The ADD EMAIL REPORT page opens; fields marked * are required.
  2. Type a Schedule Name that says what the bundle is, such as Daily Management Report.
  3. Type the first recipient into Email Address. Click + to add another address and − to remove one; at least one address is needed.
  4. Under Reports, tick every report to include. The list holds the reports of the Reports menu; scroll it to see them all.
  5. In Date Range For Report, choose the period each run should cover: Today, Yesterday, 7 Days, 30 Days, This Month or Last Month, counted back from the day it is sent.
  6. To send automatically, switch ALLOW SCHEDULE? on, choose Daily, Weekly or Monthly in Schedule Duration, pick the weekday or the day of the month under Schedule On when it appears, and choose the hour in Schedule Hours (evening hours, on the 24-hour clock). Leave the switch off for a schedule you will send by hand.
  7. Click SAVE EMAIL. The message Email Schedule has been added. confirms it and the schedule appears in the list. BACK returns to the list without saving.
Email Report list with ADD EMAIL button
ADD EMAIL REPORT page

How do I send a report bundle by hand, or change or remove a schedule? #

  1. From the Home Screen, click Reports → Management & Operational Reports → Email Report.
  2. Click the pencil icon under Action to open the schedule. Change what you need and click SAVE EMAIL; the message Email Schedule has been saved. confirms it.
  3. To send now, open the schedule and click Send Email, then OK in the Send Email Confirmation popup. ARM builds the ticked reports for the chosen date range and sends them to every address, and Email Report has been Send Mail. confirms it. Each send is also logged in the Email History under the section Send Email - Report Mails. If you have just changed the ticked reports, save first; the send button waits until the schedule is saved.
  4. To remove a schedule, click the red × under Action and confirm Are you sure you want to delete this Email Schedule?. The message Email Schedule has been deleted. confirms it.

How do I see who receives a schedule? #

  1. From the Home Screen, click Reports → Management & Operational Reports → Email Report.
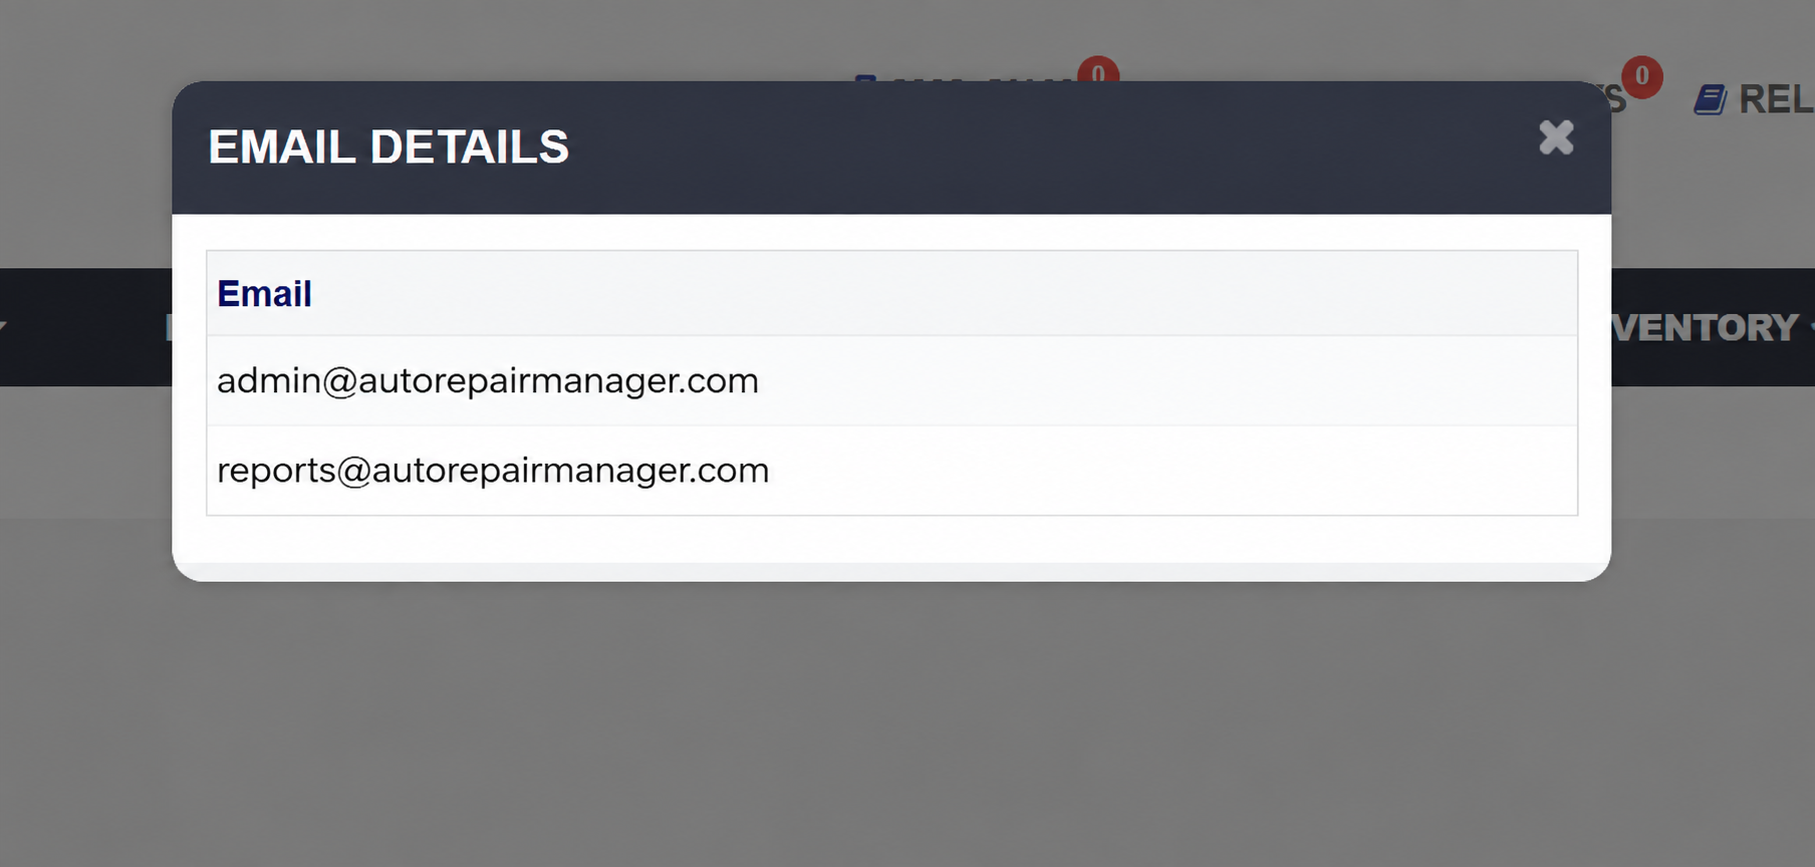
  2. Click the eye icon under Action on the schedule. The EMAIL DETAILS popup lists every Email address the bundle goes to. Close it with the × in its corner.
Email Detail popup
Email Detail popup
About this screen

The Add To Favorites switch beside the heading saves the screen under Favorites on the Reports page. Adding, editing and deleting schedules can each be protected by a permission password in the store's settings, and the screen is shown only in stores where e-mail sending is enabled. Which reports you see depends on your admin group permissions.

People also ask

  • asked 1×

Ask AI