ARM Help

Inventory Manual Count

Inventory Manual Count is how you reconcile what is on the shelf with what ARM thinks you have. Staff walk the shop and enter the quantity they actually count for each part, and the figures are held to one side until someone reviews them and applies them. Nothing in your live stock changes at the moment a count is saved, so a miscount can be corrected or thrown away before it does any harm. Use it to run a stock-take a category at a time, to check a supplier's shelf after a delivery, and to keep a record of who changed a quantity and by how much.

5 how-to answers 6 screenshots Open in ARM Markdown

How do I enter a manual inventory count? #

  1. From the Home Screen, click Inventory → Inventory Reports → Inventory Manual Count, or click Reports → Inventory Reports → Inventory Manual Count.
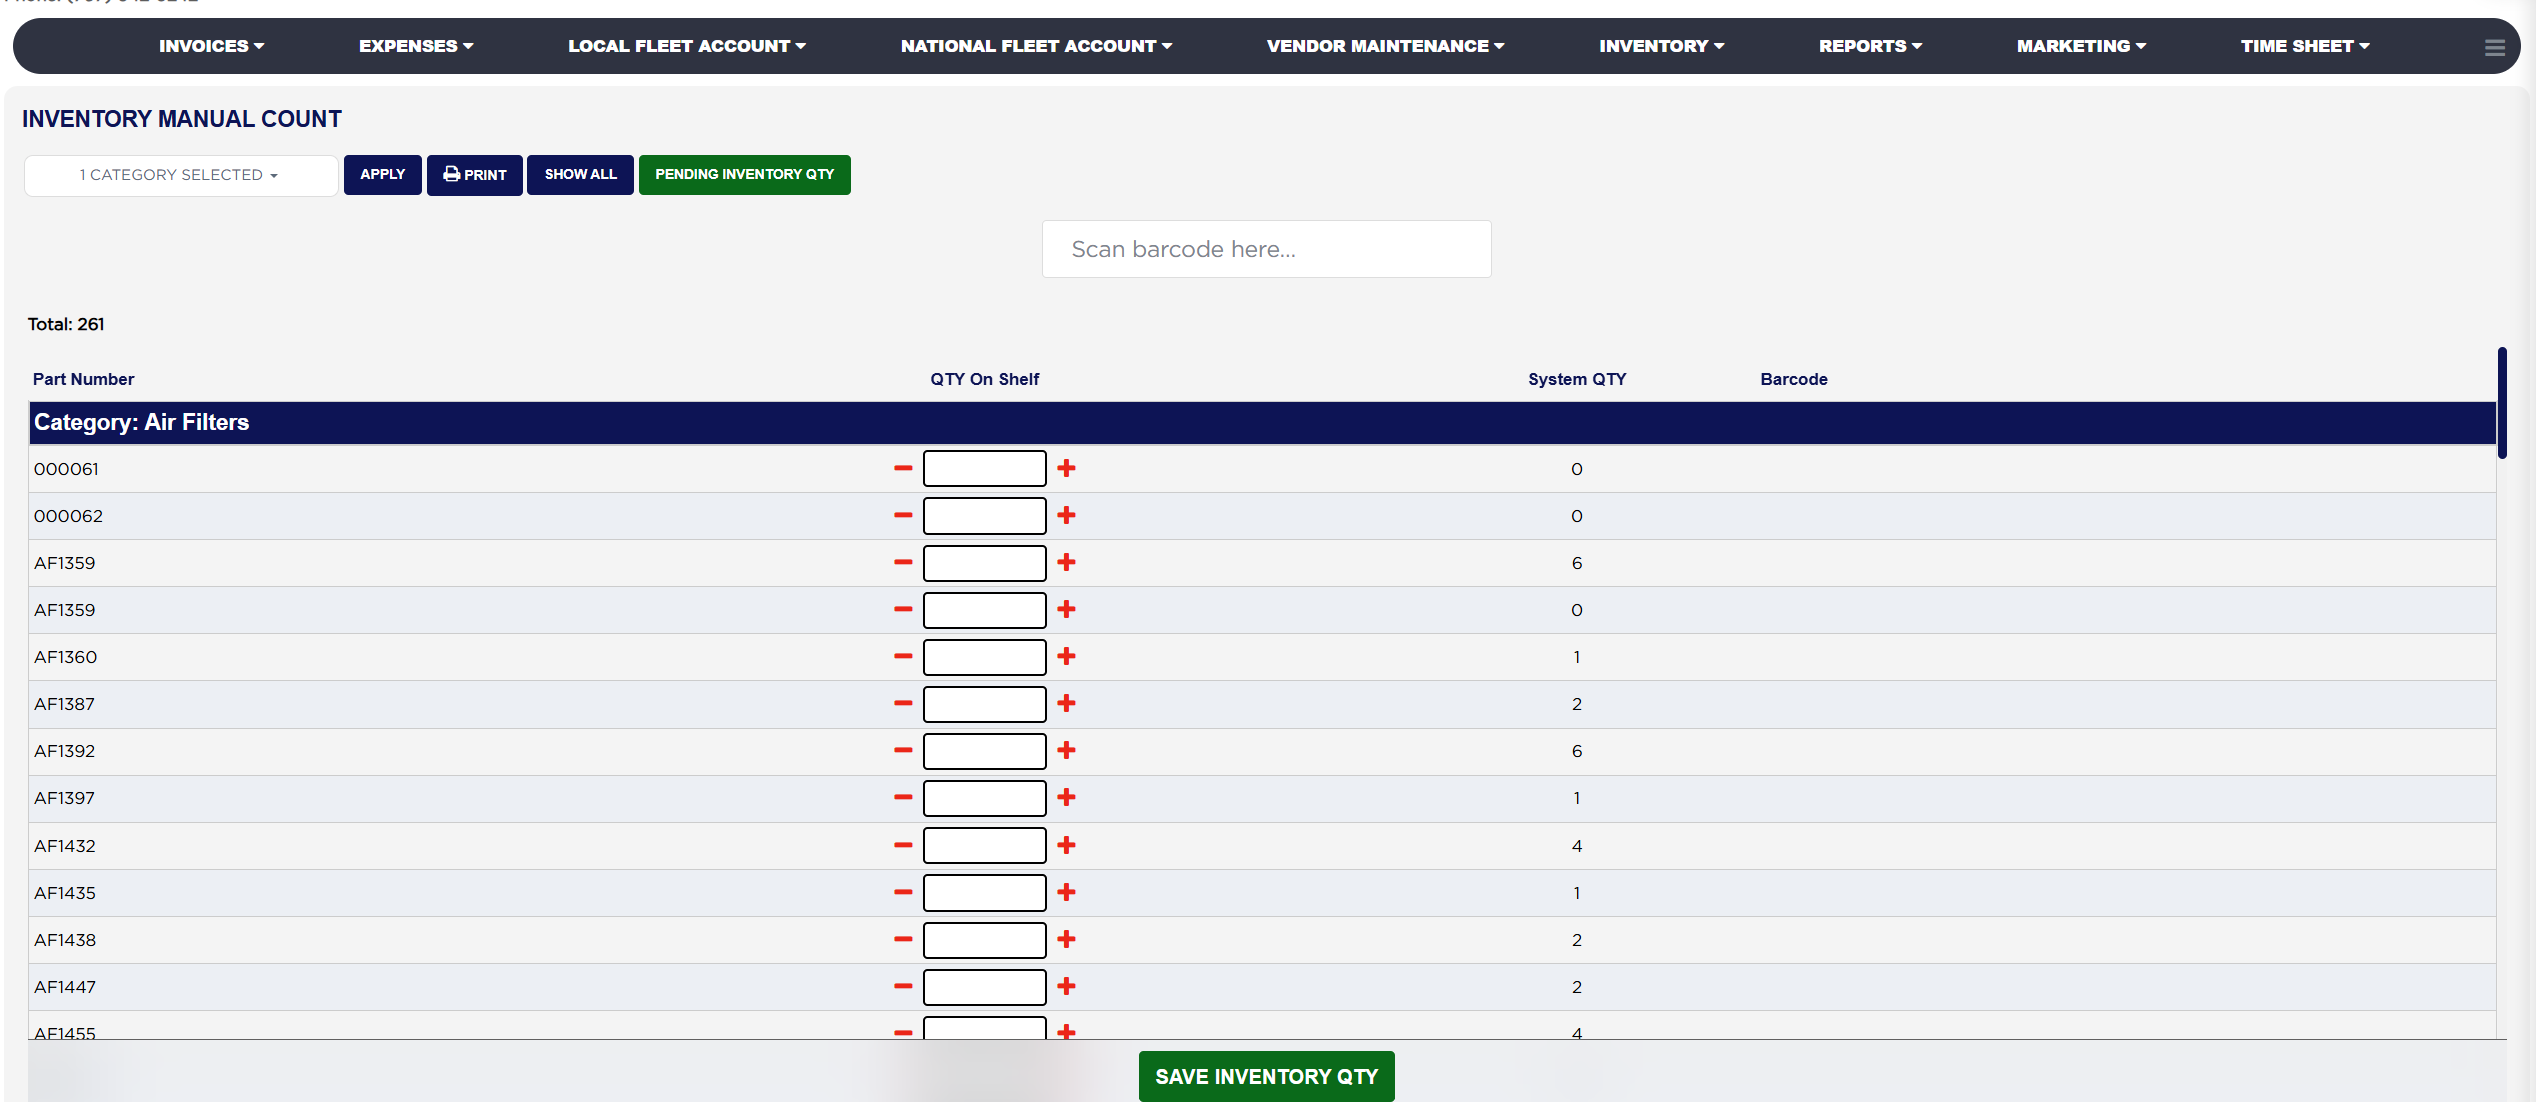
  2. Click SELECT CATEGORY and tick the categories you are counting. It is a multi-select, so you can tick several; the button then reads 1 CATEGORY SELECTED, 2 CATEGORY SELECTED and so on. Tick Select all to count everything.
  3. Click APPLY. The parts in those categories load, with a Total: count of them above the list. SHOW ALL loads every part in every category instead.
  4. For each part, type the counted figure into QTY On Shelf, or use the − and + buttons either side of the box to step it down or up by one. The row turns yellow as soon as you enter a figure, so you can see at a glance what you have already counted.
  5. Leave QTY On Shelf blank for any part you did not count. A blank is ignored and the part's quantity on hand stays exactly as it is. Enter 0 for a part that is genuinely out of stock — that is a real count, not a blank.
  6. You can also scan a part straight into the list using the Scan barcode here... box at the top.
  7. Click SAVE INVENTORY QTY. The count is saved for review under Pending Inventory Qty; your live stock is not changed yet.
Inventory Manual Count category selector and part list
Entering a counted quantity with the minus and plus buttons

How do I print a count sheet to take round the shop? #

  1. From the Home Screen, click Reports → Inventory Reports → Inventory Manual Count.
  2. Tick the categories in SELECT CATEGORY, or tick Select all, and click APPLY. The PRINT button appears beside APPLY only after you have applied a category, so ticking alone is not enough — if you cannot see PRINT, click APPLY again.
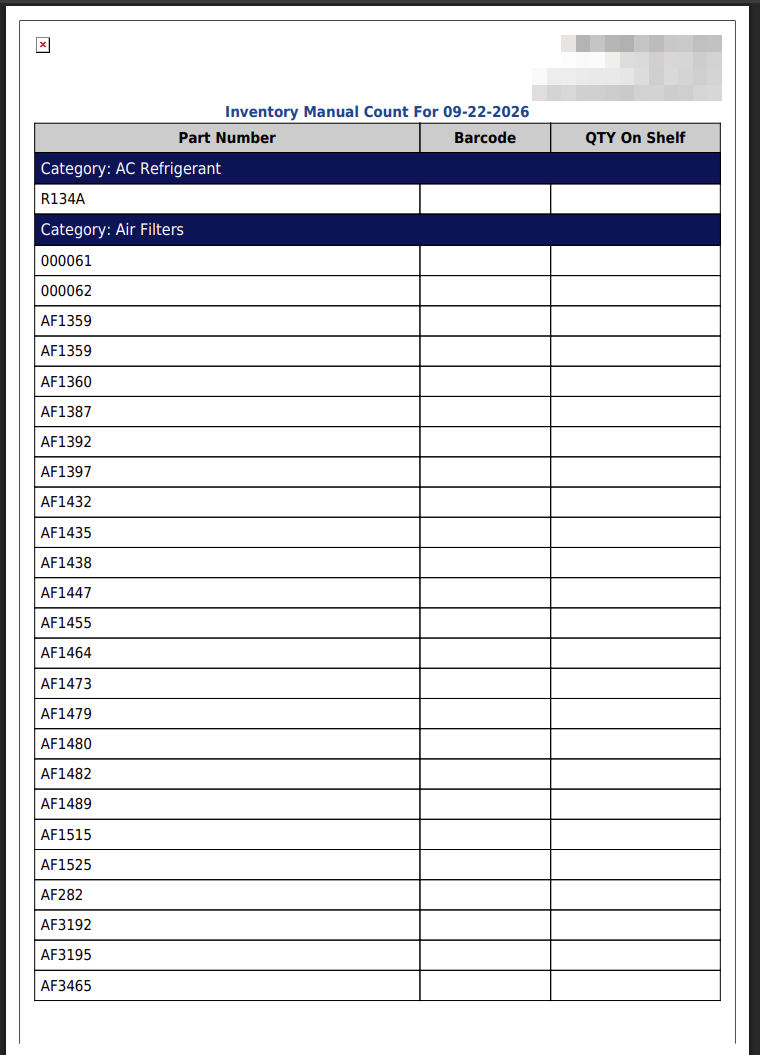
  3. Click PRINT. A PDF opens with a QTY On Shelf column left blank for staff to write in, the parts grouped under a Category: heading for each category you chose.
Inventory Manual Count printed count sheet

How do I review and apply a saved count? #

  1. From the Home Screen, click Reports → Inventory Reports → Inventory Manual Count.
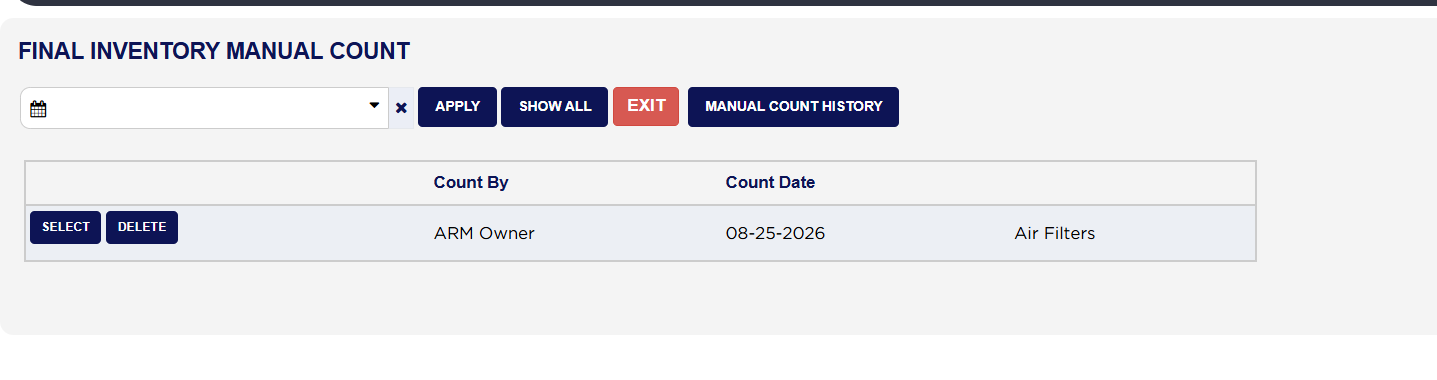
  2. Click the green PENDING INVENTORY QTY button. The Final Inventory Manual Count screen opens and lists every saved count with who made it under Count By, the Count Date, and the category it covered.
  3. Set the date range and click APPLY, or click SHOW ALL, to find the count you want. EXIT leaves the screen without applying anything.
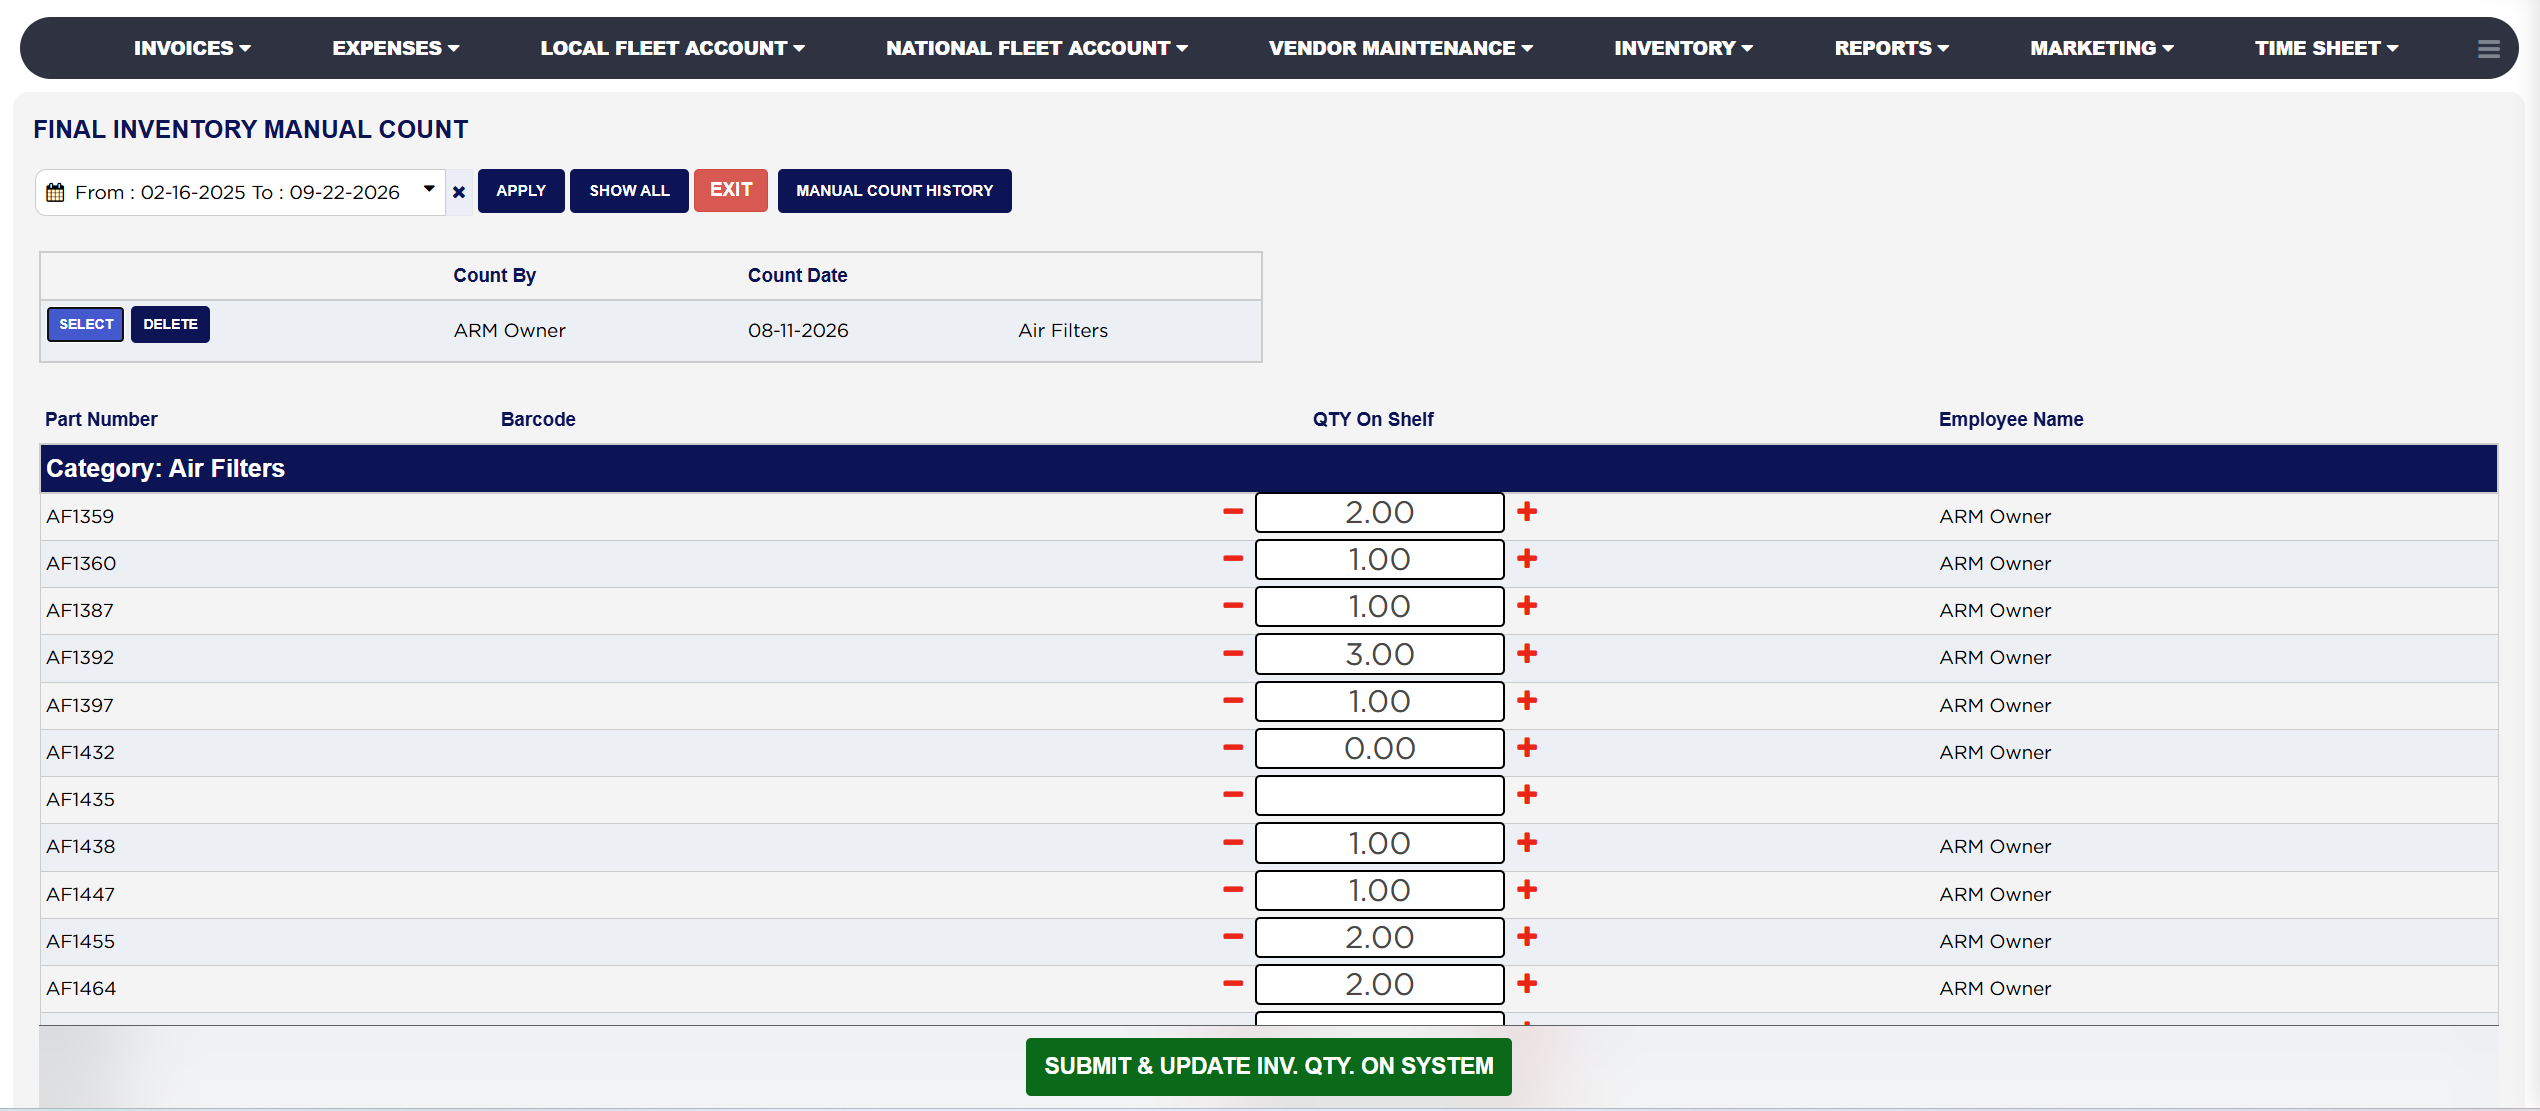
  4. Click SELECT beside a count to open its lines. DELETE throws the whole count away — use it when a count was done wrong, as nothing has reached your stock yet.
  5. Check each QTY On Shelf against the Employee Name who entered it, and correct any figure that is wrong. A part left blank with no name beside it was not counted, and applying the count will leave that part's quantity alone.
  6. Click SUBMIT & UPDATE INV. QTY. ON SYSTEM. ARM writes the counted figures to your live quantities and records who changed what.
Final Inventory Manual Count list of saved counts
A pending count opened for review

How do I see what a count changed? #

  1. From the Home Screen, click Reports → Inventory Reports → Inventory Manual Count, then PENDING INVENTORY QTY, then MANUAL COUNT HISTORY.
  2. Set the date range and click SEARCH, or click SHOW ALL. Narrow the list further by typing into SEARCH PART # / NAME, or by choosing a category in SELECT CATEGORY or a person in SELECT ADJUSTED BY.
  3. Click any column heading to sort by it; click it again to reverse the order.
  4. Click PRINT for a PDF copy or DOWNLOAD to export to a spreadsheet.
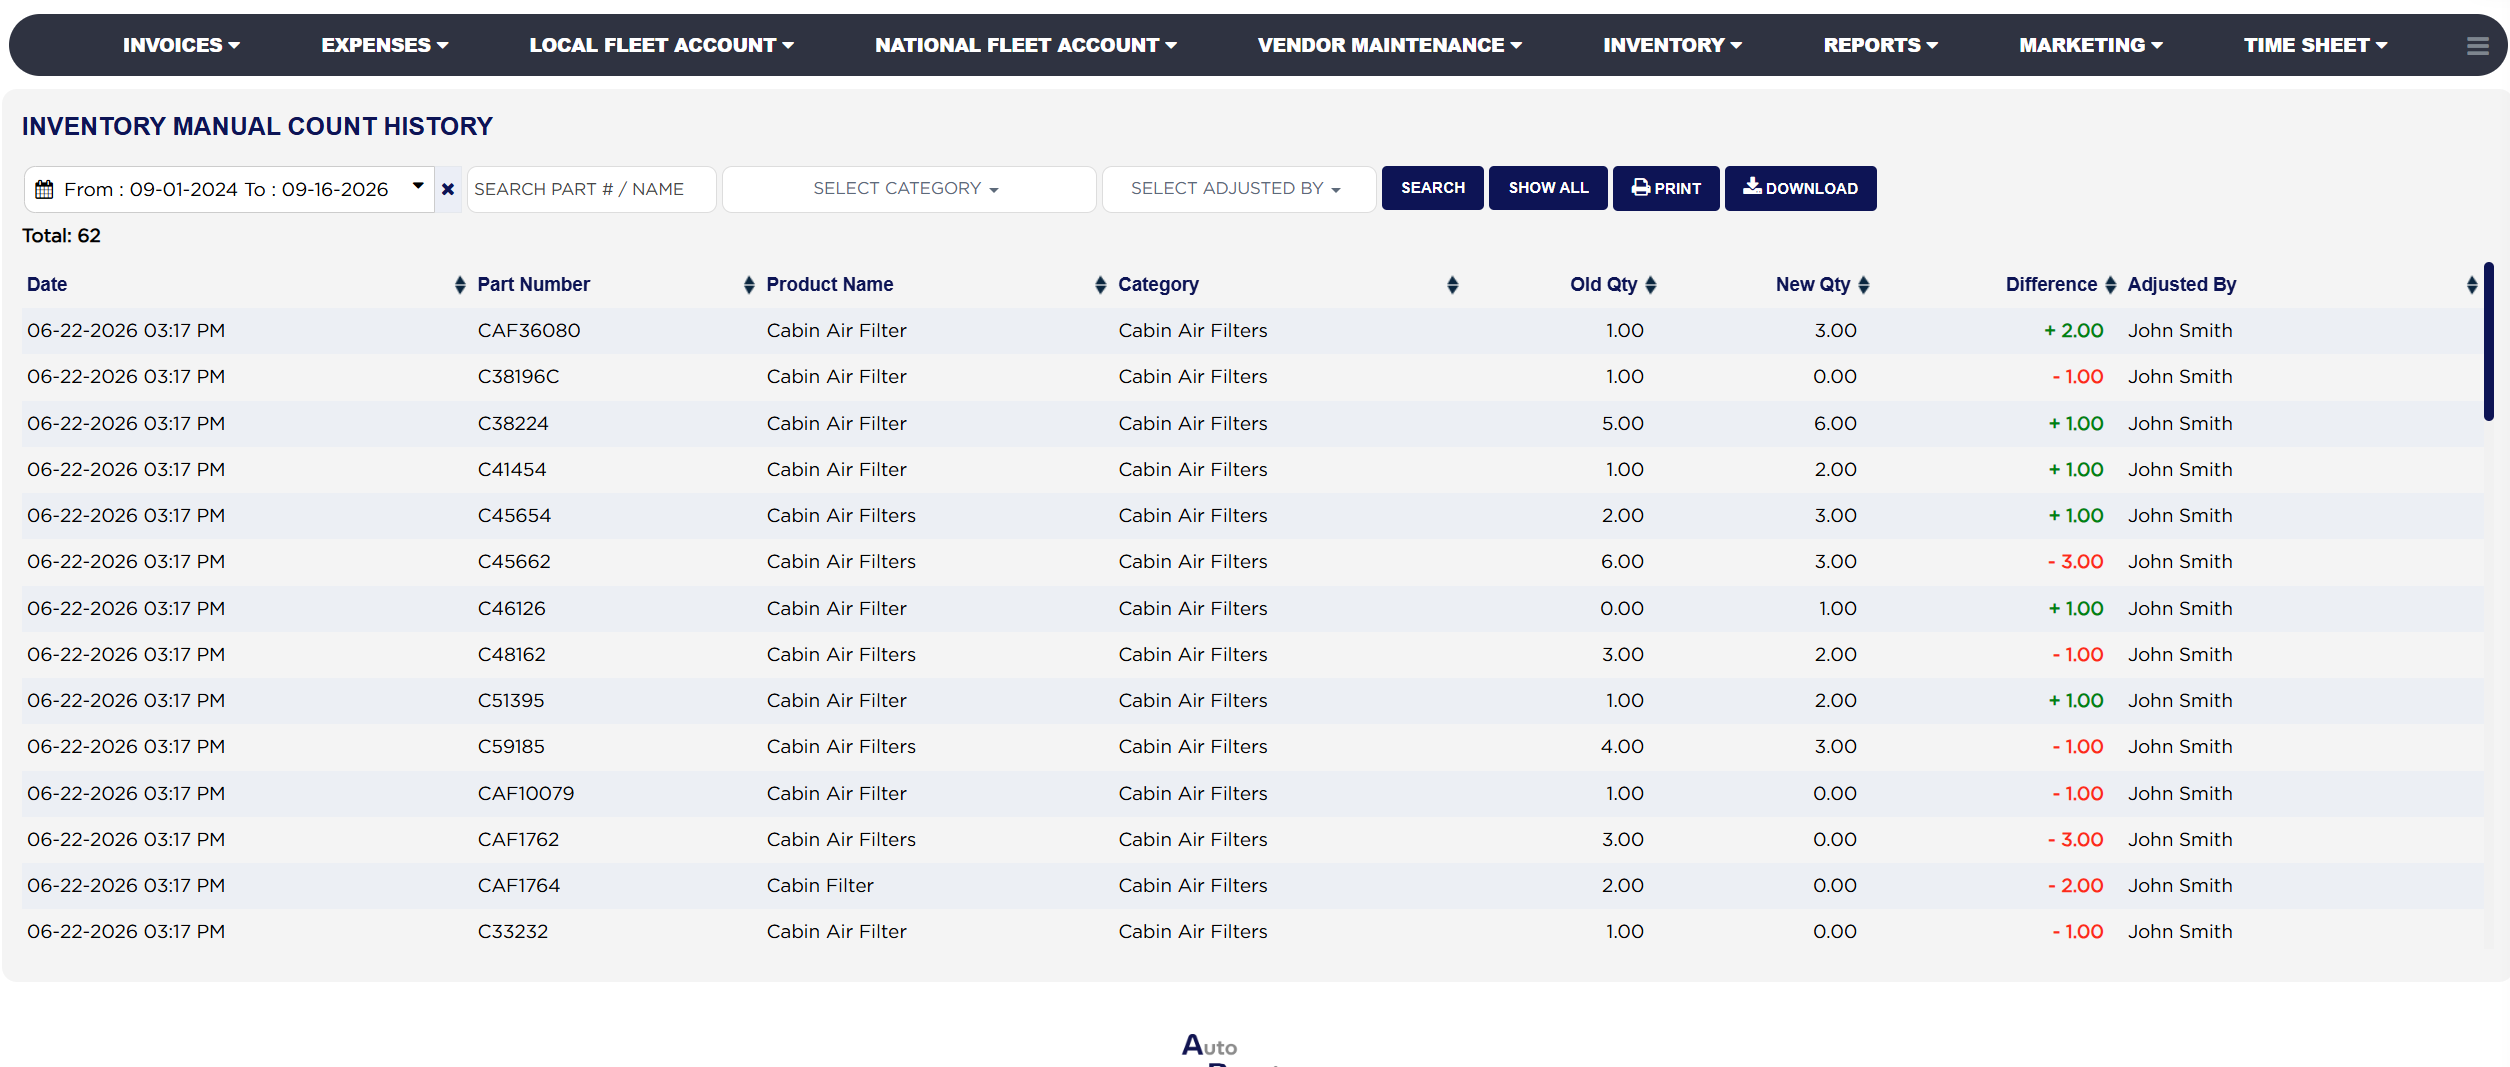
Manual Count History report

How do I work out the difference on one history line? #

  1. From the Home Screen, click Reports → Inventory Reports → Inventory Manual Count → PENDING INVENTORY QTY → MANUAL COUNT HISTORY, run it for your date range and pick one line.
  2. Old Qty is the quantity ARM held for that part immediately before the count was applied. Example: 1.00.
  3. New Qty is the figure the person counted, taken from QTY On Shelf on the count they submitted. Example: 3.00.
  4. Difference is New Qty less Old Qty: 3.00 − 1.00 = + 2.00, shown in green because the shelf held more than ARM expected.
  5. Where the shelf holds less than ARM expected the sum runs the other way: an Old Qty of 6.00 against a New Qty of 3.00 gives 3.00 − 6.00 = − 3.00, shown in red.
  6. A part that was left blank on the count never reaches this report, because its quantity was not changed.
About this screen

Each line shows the Part Number, the QTY On Shelf box you type into, the System QTY ARM currently holds for the part, and its Barcode. System QTY is shown only if your store has that setting switched on; where it is off the column is not there and staff count without seeing what ARM expects.

The printed sheet carries only three columns — Part Number, Barcode and the empty QTY On Shelf. It deliberately leaves out System QTY, so whoever walks the shelf writes down what they find rather than confirming what ARM already believes. SHOW ALL clears the category and hides PRINT with it, so choose your categories and click APPLY when you want a sheet.

Inventory Manual Count History lists one line per part whose quantity a count changed. Each line shows the Date and time the count was applied, the Part Number, the Product Name, its Category, the Old Qty ARM held before, the New Qty the count set, the Difference between them, and the person who applied it under Adjusted By. Difference is colour coded: green with a plus sign where the count raised the quantity, red with a minus sign where it lowered it. A Total: above the table counts the lines listed.

Applying a count writes straight to your live stock and cannot be undone from this screen, so review the figures before you click SUBMIT & UPDATE INV. QTY. ON SYSTEM. Deleting a pending count is safe at any time before that.

People also ask

  • asked 1×
  • asked 1×

Ask AI